In today’s digitally connected world, social media has become an essential platform for communication, business promotion, personal branding, and online marketing. Whether you manage an Instagram business account in the United States, promote an online store in the United Kingdom, or operate a growing company in Germany, publishing attractive visual content is an important part of maintaining an effective online presence. Images help businesses introduce products, communicate information, promote special offers, and connect with potential customers. However, preparing photographs and graphics for social media involves more than simply taking a picture and uploading it.
One common challenge faced by content creators, social media managers, photographers, and business owners is dealing with large image files. Modern smartphones and digital cameras capture high-resolution photographs that can easily occupy several megabytes of storage. Although these images may look excellent on a computer screen, their large file sizes can make uploading, transferring, and managing content less convenient. This becomes particularly frustrating when preparing multiple promotional graphics, product photographs, or marketing campaigns for different social media platforms.
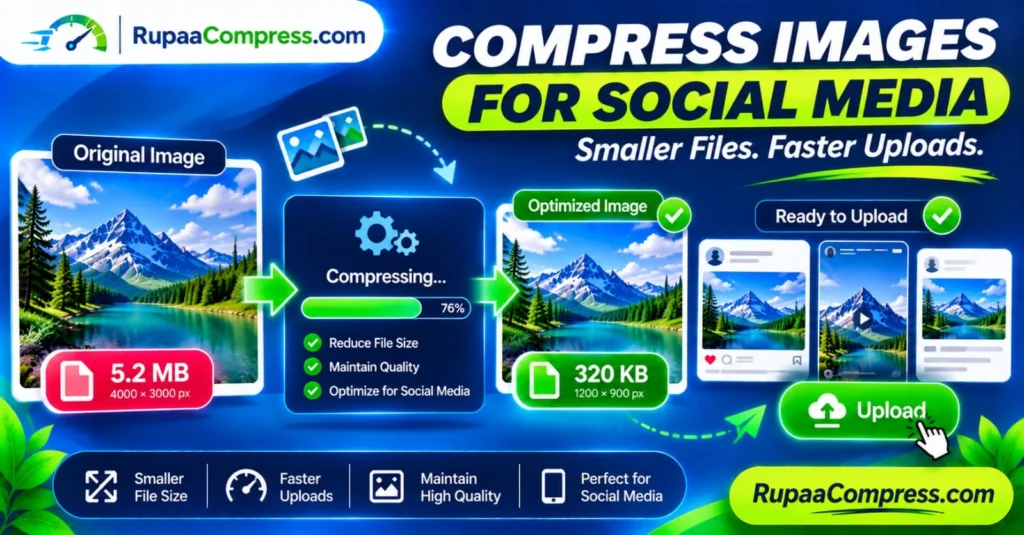
Learning how to compress images for social media helps simplify this process. Image compression reduces unnecessary file size while aiming to preserve acceptable visual quality. For example, an illustrative 4.8 MB photograph might be reduced to approximately 420 KB, representing a reduction of around 91%. The actual result depends on the original image, dimensions, format, and compression settings. By preparing appropriately optimized images before publishing, creators can make uploads easier, manage storage more efficiently, and maintain a consistent visual publishing workflow.
In this comprehensive guide, we will explain why social media image compression matters, how to select suitable dimensions and formats, how to reduce image sizes without noticeably affecting quality, and how to prepare photographs using browser-based tools such as RupaaCompress.
Why Should You Compress Images Before Uploading to Social Media?
Many people assume that photographs captured using modern smartphones and professional cameras are automatically suitable for online publishing. While these devices produce detailed images, their original files are not always optimized for social media use. A photograph captured at a very high resolution may contain more pixels and image information than necessary for its intended display size.
For example, imagine an online clothing business in London preparing a collection of product photographs for Instagram and Facebook. Each original photograph may be several megabytes in size. Uploading dozens of these images individually can create unnecessary delays, especially when working with mobile internet connections or managing multiple social media accounts.
Image compression helps reduce these file sizes before uploading. Instead of repeatedly transferring unnecessarily large files, creators can prepare smaller versions that are more convenient to organize, share, and publish.
1. Reduce Large Image File Sizes
The primary purpose of image compression is to reduce the amount of storage space required by an image. High-resolution photographs often contain more visual information than necessary for a particular social media placement.
Compression techniques encode image information more efficiently or remove selected information depending on the compression method. Lossy compression can significantly reduce file size, while lossless compression preserves the original image data.
For example, an original photograph measuring 4.8 MB might be reduced to 420 KB using suitable compression settings. This is approximately a 91% reduction in file size. However, not every image can achieve the same result while maintaining comparable visual quality.
2. Make Image Uploading More Efficient
Large image files require more data to transfer than smaller files. Consequently, reducing image size can make uploading more convenient, particularly when working with slower internet connections.
This can be useful for social media managers who regularly upload product images, promotional banners, event photographs, and marketing graphics.
For businesses managing content across different locations in the United States, United Kingdom, and Germany, preparing optimized files in advance can also simplify collaboration between marketing teams.
Smaller files do not guarantee instant uploads because internet speed, platform processing, and network conditions also influence transfer times. Nevertheless, reducing unnecessary file sizes can help make the publishing process more efficient.
3. Save Storage Space and Organize Your Content
Businesses and content creators often maintain large collections of photographs and promotional graphics. Keeping multiple high-resolution versions of every image can gradually consume significant storage space.
Image compression allows creators to maintain smaller publishing copies while preserving original photographs separately when necessary.
For example, an e-commerce company could maintain a master product photograph for future editing and a compressed version for social media publishing.
This approach helps create a more organized content library without permanently replacing original high-quality assets.
4. Maintain Better Visual Quality
An important objective of image compression is finding a balance between file size and visual appearance.
Extremely aggressive compression can introduce visible problems such as blurry edges, colour distortion, unwanted blocks, and loss of fine details. These issues are particularly noticeable in product photography, promotional banners, and graphics containing small text.
For businesses, maintaining clear photographs is important because customers often rely on product images when evaluating items before purchasing.
The best approach is to apply moderate compression, compare the result with the original, and select settings that provide a suitable balance between file size and quality.
How Image Compression Affects Instagram, Facebook, LinkedIn, and Other Platforms
Different social media platforms process uploaded images according to their own technical requirements. They may resize, recompress, or generate different versions of uploaded content to support various devices and display environments.
Understanding these differences helps creators prepare images more effectively.
Instagram Image Optimization
Instagram is widely used by businesses, creators, photographers, and online retailers to showcase products and communicate with audiences.
Common image dimensions include:
- Square feed posts: 1080 × 1080 pixels.
- Portrait feed posts: 1080 × 1350 pixels.
- Stories: 1080 × 1920 pixels.
- Reels: 1080 × 1920 pixels.
For example, a fashion retailer promoting a new collection can prepare portrait photographs using the appropriate dimensions before uploading them.
Compressing these images can reduce file sizes while maintaining a visually appealing result. Avoid excessive compression, particularly when product details, fabric textures, or small promotional text need to remain clear.
Facebook Image Optimization
Facebook supports different image layouts for feed posts, advertisements, business pages, and shared content.
A square 1080 × 1080 pixel image is a useful starting point for many standard feed graphics, while 1200 × 630 pixels is commonly used for landscape-style link previews.
Businesses should check the current specifications for the particular Facebook placement they intend to use.
Preparing appropriately sized images can help reduce unwanted cropping and make promotional graphics easier to manage.
LinkedIn Image Optimization
LinkedIn is an important platform for professional networking, business communication, recruitment, and B2B marketing.
Companies in the United States, United Kingdom, and Germany frequently use LinkedIn to publish company announcements, industry updates, educational graphics, and promotional content.
A landscape graphic measuring approximately 1200 × 627 pixels is a useful starting point for many shared visual posts.
When preparing LinkedIn graphics, prioritize readable typography, professional photography, and a clean layout. Compressing images appropriately can also make it easier for marketing teams to manage and distribute their content.
Pinterest Image Optimization
Pinterest is particularly useful for visual discovery, lifestyle content, home improvement ideas, fashion inspiration, and product discovery.
A vertical image measuring approximately 1000 × 1500 pixels is a common starting format for standard Pinterest pins.
For businesses targeting customers interested in home decoration, fashion, cooking, travel, and DIY projects, optimized vertical graphics can help present information in an organized format.
X (Formerly Twitter) Image Optimization
X supports image-based posts for news, discussions, announcements, and promotional content.
Landscape images around 1200 × 675 pixels are commonly used as a starting point for many visual posts.
Before publishing, check how your image appears in the platform preview, particularly when the graphic includes important text or product details.
The Main Benefits of Social Media Image Compression
Image compression is useful for more than simply reducing the number of kilobytes in a photograph. It can improve several parts of the content preparation and publishing process.
Faster file transfers: Smaller images generally require less data to upload, which can be particularly helpful when working with multiple photographs.
Reduced storage requirements: Compressed publishing copies take up less storage space than unnecessarily large original files.
Simplified content management: Smaller files are easier to organize, transfer between team members, and maintain in marketing folders.
More efficient publishing workflows: Preparing images in advance helps social media managers avoid repeatedly resizing and compressing files immediately before publication.
Better website image performance: When social media graphics are also used on company websites and blog pages, appropriately resizing and compressing those website images can reduce unnecessary page weight.
It is important to remember that social media image compression alone does not directly guarantee higher engagement, better organic reach, or improved search rankings. Content relevance, audience interest, design quality, and platform-specific factors remain important.
Choosing the Best Image Format for Social Media
Selecting an appropriate image format is another important part of preparing graphics for online publishing.
JPEG or JPG
JPEG is commonly used for photographs, product images, and promotional graphics containing many colours.
It uses lossy compression, allowing substantial file-size reductions depending on the selected quality settings.
For example, a product photograph captured using a smartphone can often be exported as a JPEG with an appropriate balance between file size and visual appearance.
PNG
PNG is useful for graphics requiring transparency, logos, icons, and illustrations with sharp edges.
Unlike standard lossy JPEG compression, PNG uses lossless compression. However, this can result in larger files for some types of photographic images.
For graphics containing text, transparent backgrounds, or detailed illustrations, PNG can be an appropriate choice.
WebP
WebP is a modern image format supporting both lossy and lossless compression, as well as transparency.
It can provide efficient image compression and is particularly useful for website publishing and image optimization workflows.
However, do not assume that every social media platform accepts WebP uploads in every publishing workflow. Check the platform’s supported formats and export a compatible JPEG or PNG version when necessary.
The Privacy Risks of Unverified Online Image Compression Tools
When people search for image compression tools, they often find websites that request image uploads before processing files.
Although cloud-based image services can be convenient, users should understand what happens after uploading their photographs.
Consider an online retailer preparing an unreleased product campaign for a new collection. The original photographs may include confidential product designs, unpublished marketing materials, or commercially sensitive information.
Uploading these assets to an unfamiliar website without reviewing its privacy practices may create unnecessary risks.
Before using any online image-processing service, consider the following questions:
- Does the service upload images to a remote server?
- Are uploaded files stored temporarily or permanently?
- Does the service explain its data-retention policy?
- Are files shared with external service providers?
- Can users request the deletion of uploaded content?
- Is there a clear privacy policy?
For businesses handling confidential photographs and marketing assets, understanding how a tool processes files is particularly important.
Browser-Based Image Compression: A Convenient Alternative
Modern web technologies make it possible to process certain image operations directly inside a web browser.
Client-side image processing uses technologies such as JavaScript, the HTML5 Canvas API, and browser-supported image formats to perform operations on files selected by the user.
When an image-compression tool operates entirely on the user’s device, the original image does not need to be transmitted to a remote server for that operation.
This approach can provide several practical benefits.
First, users can process supported images without depending on remote upload queues. Second, they can keep their original photographs on their own devices while creating compressed copies for publishing. Third, local processing can reduce unnecessary file transfers.
Using RupaaCompress to Prepare Social Media Images
RupaaCompress provides online image utilities designed to simplify common image-processing tasks.
Users can explore its supported image compression and resizing features to prepare photographs and graphics before publishing them on social media.
For example, an online business could resize a promotional photograph to the required dimensions, compress the resulting image, and save a smaller version for its content calendar.
When using RupaaCompress, review the specific tool’s processing method and privacy information. Only describe an operation as fully local when that feature has been verified to process files without transmitting them to an external server.
Step-by-Step Guide: How to Compress Images for Social Media
Preparing optimized images does not need to be complicated. The following workflow can help individuals, small businesses, and marketing teams produce publishing-ready graphics.
Step 1: Collect Your Original Photographs
Start by organizing the original photographs and graphics you intend to publish.
Create separate folders for Instagram posts, Facebook promotions, LinkedIn graphics, and other marketing materials.
Keep original photographs in a separate folder so you can return to them whenever you need to make design changes or export a higher-quality version.
Step 2: Resize Images for Your Target Platform
Before compression, check the intended image dimensions.
For example, prepare an Instagram square post at 1080 × 1080 pixels or a vertical Story at 1080 × 1920 pixels.
Using the correct dimensions can reduce unnecessary pixel information and help prepare images for their intended display area.
You can use the image resizing utility available on RupaaCompress to prepare supported image files.
Step 3: Compress Images to Reduce File Size
After resizing, open the image compressor and select the photograph you want to optimize.
Adjust the compression settings and review the estimated output file size where available.
For example, an illustrative 4.8 MB photograph might be reduced to approximately 420 KB. This represents a file-size reduction of around 91%.
However, the appropriate compression level depends on the original photograph and intended use. Always inspect the resulting image to ensure that important details remain clear.
Step 4: Choose a Suitable Image Format
Select a format supported by your intended publishing platform.
JPEG is a practical option for photographs, while PNG can be suitable for transparent graphics.
For website content, WebP can provide efficient compression.
Keep an original copy of your design before exporting alternative formats.
Step 5: Compare the Original and Compressed Images
Never assume that a smaller image automatically looks better.
Compare both versions at their intended display size. Pay particular attention to product edges, text, faces, logos, and fine details.
If the compressed version appears noticeably blurry, increase the quality setting or use a less aggressive compression method.
Step 6: Save and Organize Your Publishing Files
Use descriptive filenames that help identify each image.
For example:
- instagram-summer-product-post.jpg
- facebook-store-promotion.jpg
- linkedin-company-announcement.jpg
- pinterest-home-design-graphic.jpg
Organizing files this way makes it easier to locate the correct graphic when preparing future campaigns.
Step 7: Upload and Review Your Social Media Post
Upload the optimized image to the relevant social media platform.
Review the final preview before publishing. Check for unexpected cropping, changes in appearance, and readability on mobile screens.
Remember that platforms may apply their own image processing after upload. Preparing an optimized original does not prevent all additional platform compression.
Practical Image Optimization Tips for US, UK, and German Businesses
Businesses targeting international customers should maintain a consistent publishing workflow while adapting their graphics to local audiences.
For Businesses in the United States
American businesses can use optimized product photographs, promotional banners, and seasonal campaign graphics to maintain an organized publishing schedule.
When preparing advertisements, make sure that prices, discounts, and product claims are accurate and clearly communicated.
For Businesses in the United Kingdom
UK businesses should consider local spelling, currency, and promotional terminology when preparing graphics.
For example, use appropriate British English in text-based graphics and ensure that campaign information reflects the intended UK audience.
For Businesses in Germany
German businesses should pay particular attention to accurate translations, readable typography, and clear product information.
When preparing German-language graphics, use professionally checked translations rather than relying entirely on automatic translation.
Keep text organized and avoid overcrowding graphics with too much information.
For businesses operating across all three markets, maintaining separate localized versions of promotional graphics can improve clarity and provide a more professional customer experience.
Common Image Compression Mistakes to Avoid
Although image compression is useful, incorrect settings can create unnecessary problems.
Compressing images excessively: Very low quality settings can introduce visible artifacts and make photographs look unprofessional.
Ignoring image dimensions: Compressing a large photograph without resizing it may leave unnecessary pixel information in the final file.
Replacing original photographs: Always keep original files when future editing or higher-resolution exports may be necessary.
Using unsuitable image formats: Selecting PNG for every photograph or using an unsupported format can create unnecessarily large files or upload problems.
Ignoring platform specifications: Each platform may have different display and upload requirements. Check the current specifications before publishing.
Assuming compression guarantees better reach: Smaller files can improve file-handling efficiency, but they do not automatically increase social media engagement or ranking.
Failing to check the final image: Always review the compressed version before publishing, particularly when images contain small text, product details, or brand logos.
Frequently Asked Questions (FAQs)
1. Why should I compress images before uploading to social media?
Image compression reduces unnecessary file sizes, making photographs easier to transfer, upload, and organize. It can also help businesses maintain efficient content preparation workflows.
2. How much should I compress an image for social media?
There is no universal compression percentage. The ideal setting depends on the original image, dimensions, file format, and visual quality requirements. Aim for a smaller file without noticeable quality problems.
3. What is the ideal file size for social media images?
There is no single ideal file size for every social media platform. A few hundred kilobytes may be sufficient for many photographs and graphics, but more detailed images may require larger files. Follow platform upload requirements and prioritize acceptable visual quality.
4. Does compressing images reduce their quality?
Lossy compression removes some image information and may affect visual quality. Lossless compression preserves the original image data. The result depends on the format and compression settings.
5. Which image format is best for Instagram and Facebook?
JPEG is a common choice for photographs, while PNG is useful for graphics requiring transparency. Check the current supported upload formats of each platform before exporting your images.
6. Can I compress multiple images at once?
Yes, if the image-compression tool supports batch processing. Batch compression can help social media managers and e-commerce businesses prepare several photographs more efficiently.
7. Does image compression improve website speed?
Appropriately compressed and resized website images can reduce page weight and the amount of data browsers need to download. However, overall website speed also depends on hosting, caching, scripts, and other technical factors.
8. Are browser-based image compressors safe?
They can offer privacy advantages when files are processed entirely on the user’s device. However, users should verify the processing method and privacy policy of the specific tool before handling confidential images.
9. Can I compress images without losing quality?
You can use lossless compression to preserve original image data, although file-size reductions may be limited. With lossy compression, appropriate settings can often reduce file size while keeping images visually similar to the original.
10. Should I resize images before compressing them?
In many cases, yes. Resizing removes unnecessary pixel dimensions before compression, which can help reduce file size more effectively. Always retain the original image separately.
Conclusion
Compressing images for social media is a practical part of preparing professional digital content. Whether you are managing an Instagram business profile in the United States, promoting products on Facebook in the United Kingdom, or publishing company updates on LinkedIn in Germany, appropriately optimized images can make your publishing workflow easier and more efficient.
By resizing photographs to suitable dimensions, selecting the right file format, applying balanced compression settings, and reviewing the final results, you can reduce unnecessary file sizes while maintaining attractive visual quality.
Remember that smaller files are only one part of effective social media publishing. Good design, relevant content, accurate information, and a clear understanding of your audience are equally important.
Ready to prepare your next social media campaign? Explore RupaaCompress to compress and resize supported images online, create smaller publishing copies, and organize your graphics for your next social media post.
Smaller Images. Faster Uploads. Better Publishing Workflows.