In today’s competitive digital environment, creating attractive social media graphics is one of the most important parts of building a recognizable online presence. Whether you manage an e-commerce business, operate a personal blog, promote a local company, or manage digital marketing campaigns for clients, the quality of your visual content can influence how people perceive your brand.
Social media platforms such as Instagram, Facebook, Pinterest, LinkedIn, and TikTok are filled with photographs, promotional banners, product images, videos, and advertisements. Users continuously scroll through these feeds, giving individual posts only a short opportunity to capture their attention. A poorly designed image, unclear headline, or inconsistent colour combination can make even valuable content easy to overlook.
For businesses targeting customers in the United States, United Kingdom, and Germany, professional visual presentation is particularly important. Customers often compare several brands before making a purchase, and consistent, well-designed social media content can help establish credibility and communicate a professional identity.
Fortunately, creating effective graphics does not always require advanced graphic design experience or expensive software. With suitable templates, clear typography, creative elements, correct image dimensions, and reliable image optimization tools, anyone can produce attractive social media posts.
In this guide, we will explore practical design principles, platform-specific image sizes, common mistakes, and an effective workflow for creating and optimizing social media graphics. We will also explain how browser-based image tools such as RupaaCompress can help prepare images for online publishing.
Why Attractive Social Media Graphics Matter
Visual content plays an important role in digital marketing because it communicates information quickly and helps brands create recognizable identities.
When someone visits your Instagram profile, Facebook page, or LinkedIn company account, the images and graphics contribute to their first impression. Consistent colours, readable typography, professional photography, and organized layouts make a business appear more established.
There are several reasons why investing time in better social media graphics is worthwhile.
1. Capture Attention in Busy Social Media Feeds
Social media users encounter a large amount of content every day. A visually interesting post can encourage someone to pause scrolling and explore your message.
For example, an online clothing store promoting a seasonal collection could use a high-quality product photograph, a short headline, and a clear promotional message instead of filling the entire graphic with text.
The objective is to communicate the main idea immediately. Use strong visual contrast, a clear focal point, and a simple layout that makes the most important information easy to understand.
2. Build a Recognizable Brand Identity
Consistency is essential for businesses that publish content regularly.
Imagine visiting a company’s Instagram page where every post uses different fonts, unrelated colours, and inconsistent layouts. It becomes difficult to recognize the brand.
A consistent visual identity helps solve this problem.
Choose a small collection of brand colours, two or three suitable fonts, and a recognizable design style. Apply these choices to promotional graphics, product announcements, educational posts, and advertisements.
For businesses operating across the US, UK, and German markets, maintaining consistent branding across different communication channels can make marketing campaigns easier to recognize.
3. Communicate Information More Effectively
A well-designed graphic can explain an idea without requiring a lengthy description.
For example, a software company can create an infographic showing three product benefits, while a travel business can use a photograph and a short headline to promote a destination.
Use icons, illustrations, charts, and simple visual comparisons to make information easier to understand.
However, avoid placing too much text inside a single graphic. Keep the main message short and provide additional information in the accompanying social media caption.
4. Support Social Media Marketing Campaigns
Professional graphics can make promotional campaigns look more organized and consistent.
Businesses can use attractive visuals for:
- New product announcements.
- Seasonal promotions and discounts.
- Customer testimonials.
- Product comparisons.
- Educational content.
- Event announcements.
- Special offers and campaigns.
- Brand awareness advertisements.
The design should always support the campaign objective. A product advertisement, for example, should make the product and its main benefit immediately recognizable.
Four Essential Elements of Effective Social Media Graphic Design
Creating attractive social media graphics involves more than choosing a beautiful background. Good design combines layout, typography, colours, images, and visual balance.
The following four elements provide a useful starting point.
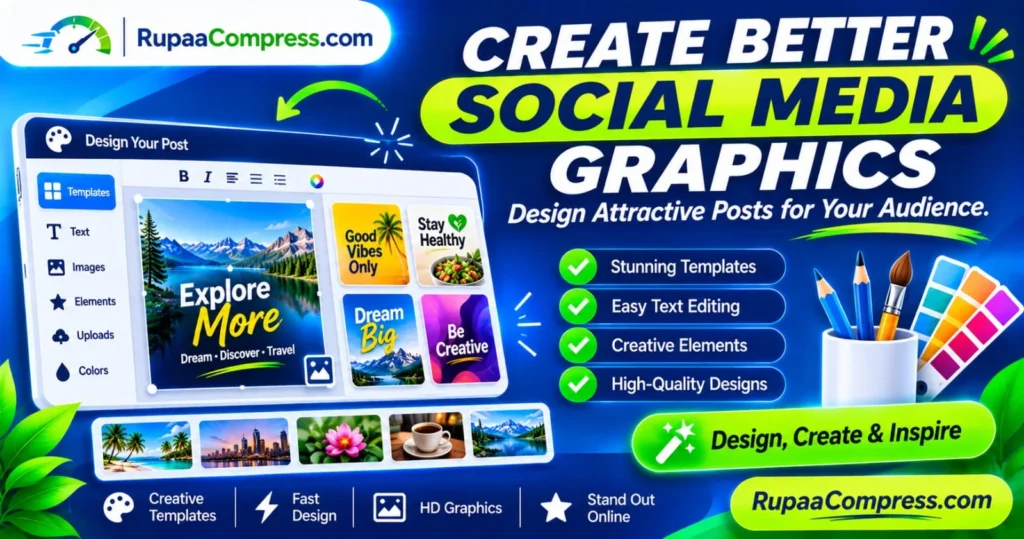
1. Professional Templates and Balanced Layouts
Templates help creators produce consistent designs without starting from an empty page every time.
A professional template normally includes a suitable content area, headline placement, image positioning, and supporting design elements.
Templates are particularly useful for:
- Small business promotional posts.
- E-commerce product advertisements.
- Educational social media graphics.
- Event announcements.
- Business quotations.
- Weekly content series.
For example, an online store could create one reusable promotional template and change the product photograph, price, and headline whenever a new product becomes available.
When selecting templates, prioritize readability and simplicity. Avoid layouts with excessive decorative elements that compete with the main message.
2. Clear Typography and Easy Text Editing
Typography determines how comfortably users can read the information in your graphics.
A common mistake is choosing decorative fonts that look attractive on a large computer screen but become difficult to read on a smartphone.
Follow these practical recommendations:
- Use readable fonts for headlines and supporting text.
- Maintain sufficient contrast between text and background.
- Keep headlines short and meaningful.
- Avoid using too many different font families.
- Highlight important words through font weight or colour.
- Leave enough space around text elements.
For example, a promotional graphic could use a bold headline such as “Summer Collection Now Available” followed by a smaller description and a clear call to action.
Your main headline should be easy to understand even when someone views the graphic on a small mobile screen.
3. Creative Elements, Icons, and Visual Details
Creative elements help make social media graphics more interesting and recognizable.
Depending on your brand style, you can incorporate:
- Simple geometric shapes.
- Decorative lines and frames.
- Relevant icons.
- Product illustrations.
- Background patterns.
- Subtle gradients.
- Borders and shadows.
For an e-commerce business, small decorative elements can help direct attention toward a product or promotional message.
For a technology company, simple icons and structured information cards may communicate features more effectively.
The important principle is moderation. Every design element should have a purpose rather than simply filling empty space.
4. High-Quality Images and Professional Finishing
Image quality directly influences how professional your social media content appears.
Blurry photographs, pixelated graphics, incorrect dimensions, and poorly cropped images can reduce the overall quality of a post.
Always begin with a suitable original image. Resize it to the intended platform dimensions, maintain an appropriate aspect ratio, and export it using a suitable image format.
For photographs, JPEG or WebP can be useful options. PNG is often suitable for graphics that require transparency, although the best format depends on the intended platform and publishing requirements.
Before uploading, review your final graphic on both desktop and mobile screens.
Recommended Social Media Image Sizes for 2026
One of the most common problems when creating social media graphics is choosing the wrong image dimensions.
Each platform supports different content formats, and the recommended dimensions can change over time. The following are commonly used design sizes.
| Social Media Content | Recommended Dimensions |
|---|---|
| Instagram Square Post | 1080 × 1080 px |
| Instagram Portrait Post | 1080 × 1350 px |
| Instagram Story | 1080 × 1920 px |
| Instagram Reel Cover | 1080 × 1920 px |
| Facebook Square Post | 1080 × 1080 px |
| Facebook Landscape Post | 1200 × 630 px |
| LinkedIn Landscape Post | 1200 × 627 px |
| Pinterest Standard Pin | 1000 × 1500 px |
| TikTok Video Cover | 1080 × 1920 px |
| YouTube Thumbnail | 1280 × 720 px |
These are practical starting dimensions, not guarantees that every platform will display an image identically. Always check the latest platform specifications before preparing an important advertising campaign.
Why Correct Image Dimensions Matter
Using the correct dimensions helps prevent unwanted cropping, stretching, and unnecessary empty space.
For example, an Instagram Story is designed for a vertical 9:16 layout. Uploading a wide landscape graphic can result in a poor presentation or require additional cropping.
Similarly, a square product graphic may work well in a standard social media feed but may not be suitable for a vertical Story or Reel cover.
Create separate versions of important graphics when necessary rather than stretching one image across every platform.
The Importance of Image Compression for Social Media
High-resolution images can contain large amounts of data. Although quality photographs are important, excessively large files are not always convenient for online publishing.
Image compression reduces file size by removing or efficiently encoding image information. Depending on the compression method and settings, the resulting image can remain visually similar to the original.
There are several advantages to preparing appropriately optimized graphics.
Faster and More Efficient Uploading
Smaller files are generally easier to upload, transfer, and manage, particularly when working with several graphics at once.
This can be helpful for social media managers who prepare multiple promotional campaigns every week.
Easier Content Management
Businesses often maintain large libraries of product photographs, campaign banners, and promotional graphics.
Reducing unnecessary file sizes can help organize these assets and save local storage space.
Better Website Image Performance
Social media graphics are sometimes reused in blog posts, landing pages, and company websites.
When images are published on websites, appropriately resizing and compressing them can reduce the amount of data browsers need to download.
This can contribute to improved page-loading performance and a better user experience.
Remember that image compression alone does not guarantee better Google rankings. Website performance also depends on hosting, code, caching, fonts, scripts, and other technical factors.
Choosing the Right Image Format for Social Media Graphics
Selecting an appropriate image format helps maintain visual quality and manage file sizes.
JPEG (JPG)
JPEG is widely used for photographs and promotional graphics containing many colours and gradients.
It is a practical choice for product photography, lifestyle images, and photographic advertisements.
PNG
PNG supports transparency and is suitable for logos, icons, illustrations, and graphics that require transparent backgrounds.
However, PNG files can be considerably larger than comparable JPEG images.
WebP
WebP is a modern image format that supports lossy and lossless compression as well as transparency.
It can be useful for website graphics and image libraries where reducing file sizes is important.
Before uploading WebP files directly to social media, check the platform’s current supported upload formats. If a platform does not support your selected format, export a compatible JPEG or PNG version.
Privacy Considerations When Using Online Graphic Editing Tools
Many online graphic editing platforms allow users to upload photographs, business assets, and promotional materials to remote servers.
This approach can be convenient, but businesses should understand how their files are handled.
Commercial graphics sometimes contain unreleased products, private campaign information, customer photographs, internal branding materials, or other confidential content.
Before using an online editing service, review its privacy policy and understand:
- Whether uploaded images are stored remotely.
- How long uploaded files are retained.
- Whether files are shared with third parties.
- Whether uploaded content is used for additional purposes.
- How users can request file deletion.
- Whether the service provides secure connections.
For organizations handling sensitive commercial assets, it is worth considering tools that process files locally in the browser.
Browser-Based Image Processing with RupaaCompress
RupaaCompress provides browser-based image utilities designed to help users perform common image-processing tasks.
Client-side processing uses technologies such as JavaScript and the HTML5 Canvas API to perform supported operations directly inside a browser.
When a tool processes a selected image entirely on the user’s device without transmitting it to a remote server, the original image does not need to be uploaded for that operation.
This approach can offer practical advantages:
- No need to create an account for supported tools.
- Convenient image processing within a web browser.
- Reduced dependence on remote upload workflows.
- More control over local image files.
- Convenient resizing and compression before publishing.
For privacy-sensitive workflows, always verify that the particular tool processes files locally and does not transmit them to external services. Browser-based processing should not automatically be interpreted as a guarantee that every feature on a website is entirely offline or server-free.
Step-by-Step: How to Create and Optimize Social Media Graphics
You do not need to be a professional graphic designer to create attractive social media posts.
Follow this workflow to prepare professional graphics for your business, blog, or marketing campaign.
Step 1: Define Your Audience and Content Objective
Before designing anything, identify who you want to reach.
A graphic designed for a US-based online clothing store may require a different visual approach from an educational LinkedIn post targeting business professionals in Germany.
Ask yourself:
- Who is the intended audience?
- What message should the graphic communicate?
- Which platform will display the content?
- What action should the audience take?
Having a clear objective makes design decisions easier.
Step 2: Choose a Suitable Template
Select a layout that matches your content type and brand identity.
For promotional posts, use a clear headline and a strong product photograph.
For educational content, use structured information cards and simple illustrations.
For product announcements, prioritize the product itself rather than unnecessary decoration.
Step 3: Add Text and Creative Elements
Write a short headline that communicates the main benefit of your message.
Use suitable typography, contrasting colours, and carefully positioned visual elements.
For example, a graphic promoting a website speed service could include the headline “Make Your Website Images Load Faster” with a simple before-and-after comparison.
Keep the design organized and avoid excessive text.
Step 4: Resize Your Graphic to the Correct Dimensions
Choose dimensions based on your publishing platform.
If you are preparing an Instagram portrait post, use a suitable 4:5 design. For vertical Stories and Reels, use a 9:16 layout.
You can use the image resizing utility available on RupaaCompress to prepare images for different publishing requirements.
Step 5: Compress the Image Before Publishing
Once the design is complete, review the image dimensions and file size.
If the file is unnecessarily large, use an image compression tool to reduce its size while maintaining acceptable visual quality.
RupaaCompress can help prepare supported image files through its compression utilities.
Always compare the compressed result with the original before publishing. Avoid excessive compression that makes product photographs or text-based graphics look blurry.
Step 6: Export in a Suitable Format
Select a format supported by your intended platform.
JPEG is a practical choice for many photographic graphics, while PNG can be useful when transparency is required.
For website publishing, WebP is another option worth considering.
Save an original copy of your design so you can make future changes without recreating the entire graphic.
Step 7: Review and Publish Your Final Design
Before publishing, check:
- Are the headlines readable on mobile screens?
- Is the main message immediately understandable?
- Are the photographs clear?
- Is the graphic correctly cropped?
- Are the colours consistent with your brand?
- Does the image look professional?
- Is the caption relevant to the visual?
Once everything is ready, publish your content with a meaningful caption and a suitable call to action.
Practical Social Media Design Tips for US, UK, and German Businesses
Businesses targeting international audiences should consider more than visual appearance.
Language, cultural expectations, purchasing habits, and communication styles can influence how audiences respond to promotional graphics.
Design for the US Market
For American audiences, consider clear promotional messages, strong product photography, and straightforward calls to action.
E-commerce graphics can highlight product benefits, seasonal campaigns, product launches, and customer-focused offers.
Ensure that promotional claims are accurate and that any advertised discounts or product information are clearly explained.
Design for the UK Market
For UK audiences, maintain a professional and approachable visual style.
Pay attention to spelling, terminology, pricing, and local campaign details. For example, use British English where appropriate, including terms such as “colour” and “organise”.
Avoid automatically reusing American promotional graphics without reviewing their language and context.
Design for the German Market
For German audiences, prioritize clear information, structured layouts, and accurate product details.
Use professionally written German translations when creating German-language graphics.
Avoid filling graphics with excessive promotional wording. A straightforward headline, relevant product photograph, and understandable supporting information can create a more professional presentation.
For businesses operating across all three markets, creating localized versions of the same campaign can be more effective than publishing one graphic with multiple languages crowded into a single layout.
Common Social Media Graphic Design Mistakes to Avoid
Even attractive designs can become ineffective when basic design principles are ignored.
Here are some mistakes to watch for:
Using too many fonts: Multiple decorative fonts can make a graphic appear unorganized. Limit your design to a small number of complementary font families.
Ignoring mobile readability: Most social media content is viewed on mobile devices. Always check the appearance of headlines and supporting text on smaller screens.
Using low-resolution photographs: Blurry product photographs can make promotional content appear unprofessional. Start with good-quality original images.
Choosing incorrect image dimensions: Different platforms have different display formats. Prepare appropriately sized versions to reduce unwanted cropping.
Overusing decorative elements: Excessive icons, shapes, borders, and effects can distract users from the main message.
Ignoring file optimization: Extremely large graphics can be inconvenient to upload and manage. Compress images appropriately before publishing.
Inconsistent branding: Frequently changing colours, typography, and layouts can make your content difficult to recognize.
Avoiding these mistakes helps create more consistent and professional social media content.
Frequently Asked Questions (FAQs)
1. How can I create better social media graphics?
Start with a clear message, choose a suitable template, use readable typography, maintain consistent brand colours, and select high-quality photographs. Resize and optimize the final graphic before publishing.
2. What is the best size for social media graphics?
The best size depends on the platform and content type. Common examples include 1080 × 1080 pixels for square Instagram posts, 1080 × 1350 pixels for portrait posts, and 1080 × 1920 pixels for vertical Stories and Reels.
3. Which image format is best for social media posts?
JPEG is useful for photographs, PNG is suitable for graphics requiring transparency, and WebP can be useful for website image optimization. Always check the platform’s supported upload formats.
4. Does image compression reduce visual quality?
It depends on the compression method and settings. Lossy compression removes some image information, while lossless compression preserves the original image data. Appropriate settings can reduce file size while maintaining visually acceptable quality.
5. How can I optimize social media images for website speed?
Resize images to their actual display dimensions, select an appropriate image format, compress unnecessarily large files, and use responsive image techniques where appropriate.
6. Are browser-based image compression tools safe?
Browser-based tools can offer additional privacy advantages when image processing takes place locally on your device. However, check the service’s privacy information and verify how individual tools handle files before using them for confidential business materials.
7. Can I use the same graphic on Instagram, Facebook, and LinkedIn?
You can reuse the same design concept, but it is better to prepare different versions for each platform. Adjust the dimensions, cropping, and text placement to suit the intended display format.
8. How often should businesses publish social media graphics?
There is no universal publishing frequency. The right schedule depends on your audience, industry, resources, and platform. Focus on maintaining a consistent schedule and publishing useful, relevant content rather than posting simply to increase volume.
9. How can small businesses create professional graphics without expensive software?
Small businesses can start with reusable design templates, free graphic design resources, and browser-based image utilities. A consistent colour palette, clear typography, and high-quality photographs can make a significant difference without requiring an expensive design setup.
10. Why should businesses optimize images before publishing them online?
Image optimization helps manage file sizes, supports efficient uploading, and improves the performance of images used on websites. It also helps businesses maintain organized image libraries and prepare content for different publishing platforms.
Final Thoughts
Creating better social media graphics is about combining visual creativity with practical publishing techniques.
Whether you operate an online store in the United States, manage a marketing agency in the United Kingdom, or promote a growing business in Germany, professional graphics can help communicate your message and build a consistent brand identity.
Start with clear templates, readable typography, appropriate colours, and high-quality photographs. Choose the correct dimensions for each platform, review your graphics on mobile screens, and optimize image files before publishing.
Remember that attractive design is only one part of a successful social media strategy. Relevant content, audience understanding, consistency, and meaningful communication are equally important.
With the right workflow and convenient image utilities, preparing professional social media graphics becomes easier and more efficient.
Explore RupaaCompress to resize and compress your images online and prepare optimized graphics for your next digital publishing project.
Create better graphics. Optimize your images. Make your brand stand out.