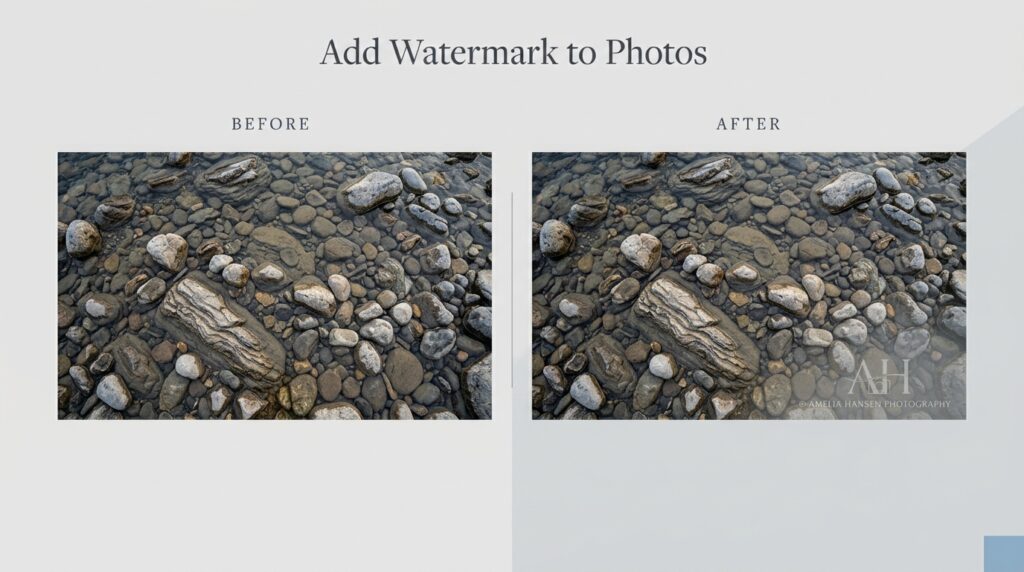
Sharing photographs online makes it easier than ever to showcase creative work, promote products, communicate ideas, and reach a wider audience. Photographers publish their portfolios, small businesses upload product images, digital creators share their designs, and website owners use photographs to make their content more engaging. However, when an image is shared publicly, it can also be copied, reposted, or separated from the person or business that originally created it. One practical way to identify the source of an image is to add a watermark. A watermark is a visible mark, usually consisting of text or a graphic, placed over an image to identify the creator, display a brand name, communicate ownership, or discourage casual reuse. A carefully designed watermark can help viewers recognize where a photograph came from while allowing the main subject to remain visible. Whether you are an independent photographer, a social media creator, an online seller, or a company managing a large collection of product photographs, understanding how to apply watermarks correctly can help you present your images more consistently and professionally.
What Is a Photo Watermark and Why Is It Used?
A photo watermark is a mark placed on an image for identification, branding, or deterrence. It may contain a photographer’s name, a business name, a website address, a copyright notice, or another short message associated with the creator. Some photographers use a small watermark in a corner of their photographs so that viewers can identify the source without distracting from the composition. Businesses may use a brand name or website address to make promotional images easier to associate with their services. Creators who share preview images with clients may use a more noticeable watermark to distinguish previews from the final files that will be delivered later. In each case, the watermark communicates information directly through the image itself, meaning that the identification mark remains visible when the picture is viewed separately from its original webpage or social media caption.
Watermarks can also support brand recognition when used consistently. For example, a photographer who publishes landscape photographs with a small, well-positioned name mark can create a recognizable presentation across a portfolio. Similarly, an online shop that uses a consistent text watermark on selected promotional images may make it easier for viewers to identify its official content when photographs are shared elsewhere. However, watermarking should be treated as one element of image management rather than a complete security solution. A visible watermark can discourage casual copying or make attribution more likely, but it cannot guarantee that someone will not reuse the image. A person with access to image-editing software may crop, cover, or digitally remove a watermark. For this reason, creators should combine thoughtful watermarking with sensible publishing practices, the retention of original files, and appropriate records of their work.
Choosing the Right Watermark for Your Images
The first step in creating an effective watermark is deciding what information it should communicate. For a personal photography portfolio, a photographer’s name may be sufficient because the main purpose is to make the creator identifiable. For a business, a short brand name or website address may be more useful because it can help viewers discover the original source. If the image is being supplied as a preview before a client receives the final files, a clear proof or preview notice may serve a different purpose. The text should be short enough to remain readable at the intended display size. Long sentences and unnecessary information can make a watermark difficult to understand and may force the text to be reduced until it becomes ineffective. A simple, distinctive mark is usually easier to recognize than a crowded arrangement of several messages.
The type of watermark should also suit the content of the image. A wedding photographer may prefer a restrained mark on preview photographs, while a business publishing product images may choose a consistent placement that matches its broader visual identity. An individual sharing artwork or digital illustrations may need to position the watermark carefully so that it does not interfere with the most important details. The key is to decide whether the priority is identification, branding, proof management, or deterring unauthorised reuse. Once the purpose is clear, it becomes easier to choose the right text, placement, and visibility. Avoid using a watermark simply because other creators use one. Every mark should have a clear reason for being present, and the final design should support rather than weaken the image.
Where Should You Place a Watermark?
Watermark placement has a major influence on both visibility and appearance. A small mark near the bottom-right corner is a common option because it can remain noticeable without competing too strongly with the main subject. Depending on the composition, the bottom-left or top-right corner may work just as well. The most important consideration is the content behind the watermark. A light watermark placed over a very bright background may almost disappear, while a dark watermark placed over a dark section of a photograph may become difficult to read. Before choosing a position, examine the image’s lighting, colours, edges, and areas of visual detail. The watermark should be located where it can be read clearly without covering a face, an important product feature, or the central point of interest.
A corner watermark is suitable when presentation is the main priority, but it is relatively easy to remove by cropping the edge of an image. A centrally positioned watermark may be harder to remove without affecting the main subject, although it can also interfere with the viewing experience if it is too large or too opaque. A tiled watermark repeats text across multiple areas of the photograph, making it more difficult to remove every mark simply by cropping away one corner. This approach is often useful for preview images, proofs, or material that should not be treated as a finished high-quality download. However, repeated marks can reduce the visual appeal of the image, so they should be used when the protective or identification purpose justifies the stronger appearance. There is no single best position for every photograph; the right choice depends on how the image will be used and how much visual interference is acceptable.
How Much Transparency Should a Watermark Have?
The opacity of a watermark determines how strongly it appears over the original image. A watermark with full opacity is completely visible, while a watermark with lower opacity allows more of the underlying photograph to show through. For many finished photographs, moderate opacity creates the best balance between visibility and presentation. RupaaCompress recommends around 30 to 50 per cent opacity for many ordinary watermarking situations, although the appropriate setting depends on the image’s brightness, colour, background, and intended use.
RupaaCompress A small white mark may work well over a dark area, while a black mark may be more visible against a lighter background. If your photographs contain a wide range of colours and lighting conditions, review each result rather than assuming that one setting will look equally good on every image.
A watermark that is too transparent may become almost invisible when the image is displayed as a thumbnail, compressed by a social media platform, or viewed on a small screen. On the other hand, a watermark that is too strong can cover important details and make the photograph appear less professional. The best setting is one that allows the mark to be read at the intended viewing size without drawing more attention than the actual subject. This is particularly important for commercial photography and product images, where customers should still be able to understand the shape, features, colour, and overall condition of the product. If the purpose is to identify a finished image, a restrained mark may be sufficient. If the image is an unpaid client proof or a preview intended to discourage reuse, a stronger watermark may be appropriate.
How to Add a Watermark to Photos Online
An online watermarking tool can simplify the process of placing text over photographs, particularly when you do not have access to advanced editing software. Begin with the original images you want to mark and decide which text should appear on them. This might be your name, business name, website address, or a short copyright notice. Open the RupaaCompress Watermark Image tool and add the photographs to the workspace. The current tool supports text watermarks and lets you choose a position, adjust opacity, and select suitable output settings. It is designed for common image formats such as JPG, PNG, and WebP. If you are working with a large collection of photographs, you can add a folder and apply consistent watermark settings across the batch instead of editing each image individually.
After loading your images, enter the watermark text and choose a position that fits the composition. Review the opacity and think about the backgrounds on which the text will appear. If all your photographs share similar lighting and colour characteristics, the same settings may work well across the collection. If the images are very different, inspect the results carefully to ensure the watermark remains visible without becoming intrusive. Once the settings are ready, process the images and review the output before using it publicly. If the tool offers a preview or before-and-after comparison, use it to verify that the watermark appears where you intended. Keep the original unwatermarked files in a separate location so that you can produce cleaner versions later if necessary.
For the actual output, choose a format suitable for the image. JPG is often practical for photographs because it can provide good visual quality at a relatively small file size. PNG may be more appropriate for certain graphics or for images where lossless output is important. WebP is another option for workflows that support it. Pay attention to the available quality settings if you export to a lossy format, and check that the watermark remains sharp and readable after the image has been re-encoded. The objective is not simply to place text over a photograph, but to create a usable final image that balances identification, appearance, and file size.
How to Watermark Multiple Photos at Once
Watermarking becomes more time-consuming when you need to prepare dozens or hundreds of images for a portfolio, online store, event gallery, or business website. Adding the same text to each photograph individually can lead to inconsistent placement, different opacity levels, and unnecessary repetition. Batch processing offers a more efficient solution by allowing you to apply the same settings across a group of files. For example, a photographer may want every preview image from a particular event to carry the same name and website address. A store may need to prepare a group of product photographs with a consistent brand identification mark. Instead of repeating the editing process for every file, batch processing helps standardize the results and can save a considerable amount of time.
Before processing a large batch, test your settings on a few representative images. This is especially useful when the photographs have different aspect ratios, backgrounds, or subject positions. A watermark that looks perfect on a landscape image may overlap an important detail on a portrait-oriented photograph. Testing a small group allows you to identify these problems before applying the same settings to the entire collection. Once the placement and opacity appear suitable, process the remaining images and inspect the output. Retain the originals separately and use meaningful filenames for the watermarked versions so that you can distinguish them later. RupaaCompress supports batch watermarking and ZIP downloads, making it practical to prepare multiple images in one workflow.
Can a Watermark Prevent Someone from Stealing Your Photos?
A watermark can make copying less convenient, but it cannot guarantee that an image will be protected from misuse. A visible mark provides a clear indication of the source and may discourage people who would otherwise repost a photograph without attribution. It can also help viewers find the creator when an image is shared beyond its original page. However, image-editing applications can be used to crop a corner watermark, cover a mark, or alter parts of a photograph. A central or tiled watermark may require more effort to remove, but no visible watermark should be considered completely tamper-proof. It is more accurate to think of watermarking as a deterrent and an identification method than as a technical barrier that prevents copying.
If protecting valuable photographs is important, consider your publishing strategy as well as the watermark itself. You might provide lower-resolution previews rather than distributing the highest-quality original files publicly. You can retain original photographs and source files, keep records of when and where your work was published, and preserve relevant authorship or copyright information. If you have concerns about the reuse of a particular image, maintaining clear documentation can be useful when establishing where the original came from. You should also remember that a watermark is not what creates your underlying rights in an image, and the presence of a watermark does not automatically settle every legal question related to ownership or reuse. The purpose of the watermark is to communicate identification and potentially discourage misuse, while broader rights and protection depend on the circumstances.
Watermarking and Photo Privacy
When preparing images for public sharing, it is worth considering privacy as well as branding. Photographs can contain metadata that records information about the file, the camera, the date, and, in some cases, the location where the image was captured. Depending on the device, software, and settings used to create a photograph, this information may reveal details that you did not intend to share. Adding a visible watermark does not automatically hide that information. If privacy matters, check the metadata handling of your editing workflow and review the image before publishing it. You may decide to remove location data before posting personal photographs publicly, particularly when the images could reveal the location of a home or another private place.
The RupaaCompress Watermark Image tool states that watermarking is processed locally in your browser and that metadata, including EXIF and GPS information, is stripped when the image is re-encoded.
RupaaCompress This can be helpful when preparing public-facing images, but there is an important consideration: metadata may also contain copyright or authorship information that you want to retain. Keep your original files and maintain relevant ownership records separately, and check your final export if particular metadata fields are important to your workflow. Privacy and attribution are related but different concerns, so a suitable process should account for bot
Common Watermarking Mistakes to Avoid
One of the most common mistakes is making the watermark so large that it becomes the main subject of the photograph. Although a bold mark may sometimes be necessary for a proof or preview, it can reduce the appeal of a finished photograph when used without a clear purpose. Another mistake is placing the mark where it covers a face, product label, important text, or another detail that viewers need to see. Watermarks can also become ineffective when the text has insufficient contrast with the background. A light mark over a white sky or a dark mark over a shadowed area may become difficult to identify, even if the chosen opacity seems reasonable. Reviewing the watermark at the expected viewing size is therefore just as important as selecting the correct text and position.
A further mistake is overwriting the original image and losing the clean version. Once a visible watermark has been embedded in a flattened image, removing it neatly may be difficult or impossible without editing the photograph. Keeping separate original and watermarked files gives you greater flexibility and reduces the risk of having to recreate an image from scratch. You should also avoid assuming that one set of settings will produce the same result on every photograph. A corner mark might work well for one image but become nearly invisible on another. A tiled watermark may be suitable for a preview but too distracting for the finished version. Testing the output, maintaining original files, and choosing settings according to the purpose of each image will lead to better results.
Add Watermarks to Your Photos with RupaaCompress
A well-designed watermark can help make your photographs identifiable, reinforce a consistent visual identity, and discourage casual reuse without unnecessarily damaging the viewing experience. The most effective approach is to start with a clear purpose, choose short and meaningful text, position it carefully, and adjust its opacity so that it remains visible without overpowering the image. You should also choose suitable output settings, retain unwatermarked originals, and consider privacy and metadata when preparing images for public distribution. These practices are useful whether you are managing a personal portfolio, preparing previews for clients, sharing creative projects, or organizing photographs for a business website.
The RupaaCompress Watermark Image tool provides a browser-based way to add text watermarks, adjust their position and opacity, and process multiple images in one workflow. The website states that image processing happens locally in your browser, so your image files are not uploaded to its servers during this process.By combining a suitable watermark with good image-management practices, you can prepare photographs that communicate their source while remaining appropriate for their intended audience. Explore the tool and create a consistent watermarking workflow for your next photo collection, creative project, or online business.