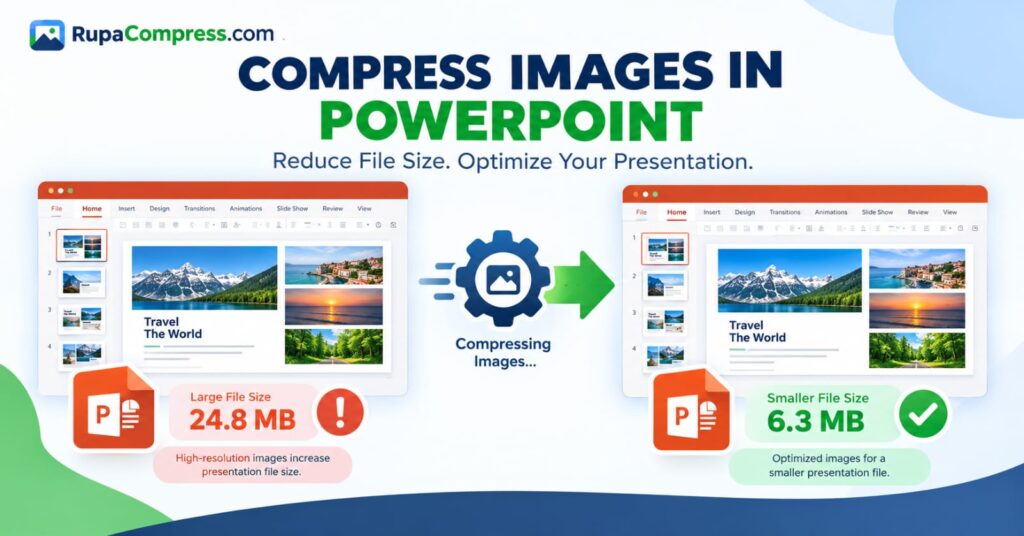
Have you ever finished creating a PowerPoint presentation, only to discover that the file is too large to email or upload? This is a common problem for students, teachers, business professionals, designers, and anyone who regularly works with presentations. High-quality images make your slides more attractive and help explain complicated ideas, but they can also increase the size of your PowerPoint file significantly. For example, adding several high-resolution photographs from a smartphone, product catalogue, or digital camera may turn a small presentation into a file that occupies 20 MB, 30 MB, or even more. A large PowerPoint presentation can take longer to upload, consume more storage space, and become difficult to share when an email service or learning platform imposes a file-size limit. Fortunately, deleting your photographs is not the only solution. Learning how to compress images in PowerPoint allows you to reduce unnecessary image data while maintaining the visual quality your slides need. Microsoft PowerPoint includes a built-in picture compression feature that can reduce image resolution and remove hidden portions of cropped pictures. You can also compress images before inserting them into your presentation using an image optimisation tool such as RupaaCompress. For example, a presentation measuring 24.8 MB might shrink to approximately 6.3 MB after suitable optimisation, although the actual result depends on its images, videos, and other embedded content. In this guide, you will learn how to compress pictures in PowerPoint, reduce PPT file size, choose the right image settings, and prepare smaller images before adding them to your slides.
Why Does a PowerPoint Presentation Have a Large File Size?
Understanding why a PowerPoint file becomes large helps you choose the right way to reduce its size. One of the biggest contributors is high-resolution photography. Modern smartphones and digital cameras produce detailed images that can occupy several megabytes each. When you insert multiple photographs into a presentation, their combined size can increase the total file size quickly. This is particularly common in marketing presentations, university assignments, business proposals, photography portfolios, and training materials that contain many visual examples.
Another reason is that resizing an image on a slide does not necessarily reduce the size of its original image data. For example, you might insert a photograph measuring 4000 × 3000 pixels and make it appear as a small thumbnail in the corner of a slide. Although the image looks smaller on the screen, PowerPoint may retain the original high-resolution picture. Similarly, cropping an image can leave the removed portions stored in the presentation so that you can restore them later. These editing features are useful, but the retained data can increase file size.
Images are not the only possible cause. Embedded videos, audio recordings, animations, and custom fonts can also contribute to a large PowerPoint presentation. If your file contains several high-resolution videos, compressing pictures alone might not make a significant difference. In that situation, you may need to optimise the media files as well. Before changing anything, save a backup of your original presentation and check which elements are responsible for most of the file size. Once you identify the problem, you can choose whether to compress all pictures, resize individual images, remove unnecessary cropped content, or reduce the size of embedded media.
How to Compress Images in PowerPoint Step by Step
Microsoft PowerPoint offers a built-in way to compress pictures directly inside a presentation. This is particularly useful when you have already created your slides and want to reduce the file size without rebuilding the entire presentation. The following instructions apply primarily to supported desktop versions of PowerPoint. Some options may differ depending on your version and operating system.
Step 1: Open Your PowerPoint Presentation
Open the .pptx file you want to optimise. Before making changes, save a separate backup copy using a name such as presentation-original.pptx. This is important because some picture compression options can remove image data permanently after the changes are saved. Keeping the original file gives you a way to recover your previous images if you later need their full resolution.
Step 2: Select a Picture on Your Slide
Navigate to a slide containing a photograph or another inserted image and click the picture. When a compatible image is selected, PowerPoint displays a contextual tab called Picture Format in the ribbon. If you do not see this tab, make sure you have selected the image itself rather than a text box, chart, or shape.
Step 3: Open the Compress Pictures Option
Click Picture Format, then look for Compress Pictures in the Adjust group. Depending on your PowerPoint version and window size, the button may appear as an icon without a visible text label. Click the command to open the available picture compression settings.
Step 4: Compress All Pictures in the Presentation
In the compression dialog box, look for the option labelled Apply only to this picture. Leave it selected if you want to compress just the chosen image. If you want to reduce the size of the entire presentation by compressing its pictures, clear this checkbox.
Be careful when using this setting because applying the same compression preferences to all pictures can override previous settings for individual images. If your presentation includes detailed screenshots, technical diagrams, and ordinary photographs, inspect the final results to make sure the quality remains suitable throughout the file.
Step 5: Delete Cropped Picture Areas if Appropriate
If you have cropped photographs and no longer need their hidden portions, enable Delete cropped areas of pictures if the option is available. PowerPoint can retain the parts removed during cropping so that you can change the crop later. Deleting these areas can reduce the amount of image data stored in the presentation.
However, this action limits your ability to restore the original cropped content. Always keep an original image or presentation backup before proceeding.
Step 6: Choose the Resolution and Save
Choose an appropriate resolution from the available options and click OK. Save the presentation, then check the new file size using your operating system’s file manager.
Open the saved presentation and inspect several slides. Look for blurry photographs, unreadable screenshot text, or loss of detail in diagrams. If the quality is not acceptable, return to your backup and try a less aggressive setting. For additional guidance, consult Microsoft’s official instructions for reducing the file size of PowerPoint presentations.
How to Reduce PowerPoint File Size Without Losing Image Quality
Reducing a presentation’s file size does not necessarily mean making every image look worse. The key is to use appropriate dimensions and compression settings for the way your slides will be viewed.
For example, a photograph that occupies half a slide may not need the same resolution as an image intended to fill an entire high-resolution display. A smaller image that matches the space available on the slide can often deliver a good visual result while using less storage space. By contrast, an image containing small text, detailed diagrams, or product specifications may need more resolution to remain readable.
Start by considering the intended use of the presentation. If you are sharing lecture slides online, displaying them in a classroom, or sending a business proposal by email, you may be able to use moderately compressed images. If the presentation will be displayed on a large screen or used for detailed technical reviews, preserving additional visual information may be more important.
You should also pay attention to the image format. JPEG is generally suitable for photographs because it can provide good visual quality at a relatively small file size. PNG may be more appropriate for screenshots, diagrams, sharp-edged graphics, and pictures that require transparency. Do not convert every image to JPEG automatically if doing so would make text or transparent graphics look worse.
Another useful option in supported desktop versions of PowerPoint for Windows is adjusting the default picture resolution. You can find this under File → Options → Advanced → Image Size and Quality. Available settings vary by version. Microsoft also notes that discarding stored picture-editing data or reducing the default resolution can help decrease file size, but these changes may limit your ability to restore previous edits. Always work from a backup and examine the final slides before sharing them.
The best result is a presentation that is small enough to share conveniently while retaining the detail your audience needs.
How to Compress Images Before Adding Them to PowerPoint
Another effective way to reduce PowerPoint file size is to optimise your pictures before inserting them into your slides. This is particularly useful when you are preparing a new presentation containing multiple photographs, product images, screenshots, or marketing graphics.
Instead of inserting an original camera photograph measuring thousands of pixels across, consider whether the image needs to be that large for its intended position on the slide. Resizing it to suitable dimensions can remove unnecessary image data before it enters the presentation. You can then compress the resized image to reduce its file size further.
To do this, visit RupaaCompress and explore the available image tools. Choose a suitable image resizing or compression tool, select the source image, and prepare an optimised version based on your presentation layout. Keep an original copy so that you can make changes later without losing the source image.
For example, a collection of large product photographs may be easier to manage if you resize them before importing them into a PowerPoint sales presentation. Similarly, screenshots used in a tutorial may benefit from appropriate resizing, provided the text remains clear and readable.
Once you have downloaded the optimised images, insert them into PowerPoint and check how they appear on the slides. Adjust the size and positioning where necessary. Remember that image compression results vary depending on the original file, dimensions, and settings. There is no guaranteed file size for every image.
For existing presentations, PowerPoint’s built-in compression feature may be more convenient. For new presentations, preparing your pictures in advance can help prevent unnecessary file-size growth from the beginning. Combining both methods can be useful, as long as you avoid repeatedly compressing images so aggressively that their quality deteriorates.
Other Ways to Make a PowerPoint Presentation Smaller
If compressing pictures does not reduce your PowerPoint file size enough, consider whether other content is taking up space.
Compress embedded videos and audio. Presentations containing large media files can become substantially bigger than image-only slides. Supported desktop versions of PowerPoint for Windows provide media compression options under File → Info → Compress Media. The available choices depend on your version. Review video and audio playback after compression because quality may be reduced.
Remove unnecessary content. Delete duplicate pictures, unused media, and slides that are no longer required. Removing content that does not contribute to the finished presentation can help keep the file manageable.
Review cropped pictures. If you have cropped images throughout the presentation, removing hidden cropped areas can reduce the stored image data. Use this option only when you no longer need to restore those portions.
Review embedded fonts. Custom fonts can increase a presentation’s size when embedded in the file. In supported desktop versions, PowerPoint provides options for embedding only the characters used in the presentation. Choose the appropriate setting based on whether recipients need to edit the slides.
Share a cloud link when appropriate. If your presentation contains high-quality images or video that should not be compressed further, sharing the file through an approved cloud-storage service may be a better choice than reducing its quality unnecessarily.
Check the final file size. Save the presentation after optimisation and compare the new size with the original. The result depends on the types of content included, so always verify whether the file meets your sharing requirements.
Common Mistakes to Avoid When Compressing PowerPoint Pictures
One common mistake is choosing the lowest available resolution for every image. Although aggressive compression may reduce the presentation’s size, it can also make photographs appear soft and cause small text in screenshots to become difficult to read. Instead, select appropriate settings for the presentation’s purpose.
Another mistake is assuming that dragging an image’s corner handles to make it smaller will reduce the original file size. Display dimensions and stored image data are not necessarily the same. Use picture compression or resize the source image when you need to reduce the underlying data.
You should also avoid deleting cropped picture areas before finishing your edits. Once the hidden portions have been discarded and the file is saved, they may not be recoverable through ordinary editing. Keep a backup before using this feature.
Finally, do not judge success by the file size alone. A smaller PowerPoint presentation is helpful only if the slides remain readable, images display correctly, and embedded media still works as expected. Review the final presentation before emailing it, uploading it to a learning management system, or sharing it with a client.
Frequently Asked Questions
How do I compress all pictures in PowerPoint at once?
In a supported desktop version of PowerPoint, select a picture, open Picture Format, and click Compress Pictures. Clear the Apply only to this picture option to apply compression across the presentation’s pictures, then choose a suitable resolution and save the file.
How can I reduce PowerPoint file size for email?
Start by compressing the pictures in your presentation. Remove unnecessary cropped image data where appropriate, optimise embedded videos if needed, and save the file. If the presentation still exceeds your email attachment limit, consider sharing it through an approved cloud-storage link.
Does compressing images in PowerPoint reduce quality?
It can. Compression settings may reduce image resolution or remove image information. Higher-quality settings generally preserve more detail, while stronger compression can introduce blur or visible artefacts. Check the final slides before sharing the presentation.
Why is Compress Pictures greyed out in PowerPoint?
Make sure you have selected a compatible picture and are using a version that supports the feature. The Picture Format tab appears when a suitable image is selected. Some picture compression features are not available in PowerPoint for the web.
Can I reduce a 25 MB PowerPoint file to 5 MB?
Possibly, but no particular reduction is guaranteed. The result depends on the original pictures, embedded media, and other file content. Presentations containing many large photographs may shrink considerably, while files dominated by video may require additional optimisation.
Is it better to compress pictures before or after inserting them?
Both approaches are useful. Pre-compressing images helps keep a new presentation lightweight, while PowerPoint’s built-in compression can optimise pictures in an existing presentation. Choose the method that best fits your workflow and check the final image quality.
Can RupaaCompress reduce PowerPoint presentation size?
RupaaCompress provides image tools that can help you resize and compress photographs before inserting them into PowerPoint. Optimising the images may help reduce the presentation’s total size, although the result depends on the amount of image data and other content in the file.