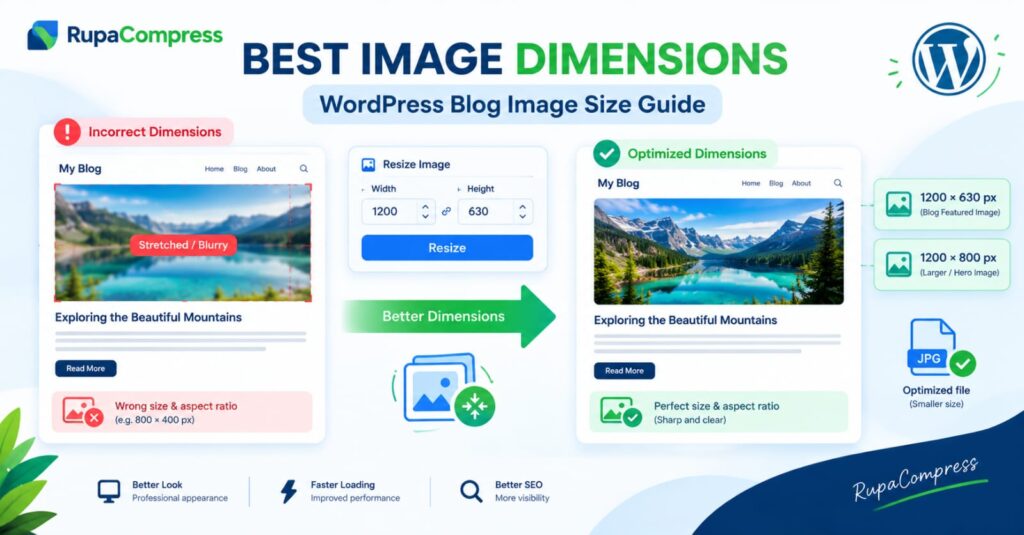
Creating a successful WordPress blog involves more than writing helpful articles and choosing the right keywords. Your images also play an important role in making your website look professional, keeping readers interested, and improving the overall user experience. Whether you publish tutorials, product reviews, technology articles, or SEO guides, using the correct WordPress image dimensions helps your content look consistent across desktop computers, tablets, and mobile phones. Imagine publishing a well-written article with an attractive featured image, only to discover that the picture looks stretched, important text is cut off, or the subject appears blurry on your website. These issues often happen when the original image has unsuitable dimensions or an aspect ratio that does not match the design of your WordPress theme. For example, an image measuring 800 × 400 pixels may work well in a particular content area, but it might not provide enough flexibility for a larger featured-image layout or a high-resolution display. For many blogs, 1200 × 630 pixels is a useful starting point for featured images and social sharing previews, while 1200 × 800 pixels can be suitable for some larger landscape images. However, the ideal dimensions depend on your WordPress theme, page layout, and intended use. You should also remember that image dimensions and image file size are different: dimensions describe the width and height in pixels, while file size measures how much storage space the image requires. Preparing your images properly before uploading them helps you avoid unnecessary editing, maintain a consistent visual style, and create a better experience for visitors. In this guide, we will explore the best image sizes for WordPress blog posts, explain how oversized graphics can affect website performance, and show you how to resize and compress images using free browser-based tools such as RupaaCompress.
Why Correct Image Dimensions Matter for WordPress Blogs
Choosing the right WordPress image size is important for both appearance and website performance. Although many WordPress themes automatically resize images to fit different screens, this does not mean that uploading every image at its original size is a good idea. A theme may display an oversized photograph inside a small content column, but visitors could still need to download a much larger file than the layout requires, depending on how the image is delivered. This can increase page weight and contribute to slower loading, particularly for visitors using mobile data or slower internet connections. Image optimisation can therefore support a faster website, although actual loading performance also depends on hosting, caching, scripts, fonts, and other page elements. Correct proportions are equally important. If your blog design uses a horizontal featured-image area and you upload a tall portrait, the theme may crop the image automatically, cutting off important information or moving the main subject out of view. Maintaining consistent dimensions across your blog archive, related-post sections, and article headers creates a cleaner and more professional appearance. It can also make your website easier to maintain because you do not have to correct each image individually after publishing. For SEO, properly sized and compressed images can contribute to a better user experience and help improve page performance, while descriptive filenames, useful alternative text, and relevant surrounding content help search engines understand your visuals. There is no single image dimension that guarantees better Google rankings, so the goal is to balance image quality, file size, layout requirements, and accessibility. For most WordPress blogs, start by checking your theme’s recommended featured-image size, identify the width of your main content area, and prepare each graphic according to how it will actually appear on the page.
Best WordPress Image Dimensions and How to Resize Them Using RupaaCompress
Different areas of a WordPress website require different image dimensions, so choosing a suitable size for each purpose will save time and help maintain a consistent design. For blog featured images and social sharing graphics, 1200 × 630 pixels is a practical starting point because its approximately 1.91:1 aspect ratio is widely used for link previews. However, the final appearance can vary across platforms and WordPress themes, so keep important text and visual elements away from the edges. For images placed inside article content, a width of approximately 800–1200 pixels is often suitable for landscape graphics, screenshots, and tutorials, depending on the content column and display requirements. For larger website banners or hero sections, you may need a width of 1200–1920 pixels, although the correct height depends on your design. Small square graphics, author portraits, and some sidebar images may work well at 150 × 150, 200 × 200, or 300 × 300 pixels. These are useful guidelines rather than mandatory WordPress standards. To prepare your graphics, first keep an original copy of the photograph or design. Next, open RupaaCompress and choose the appropriate image tool. If the original image has too much unwanted space or the wrong proportions, use the crop tool to select the desired aspect ratio and position the subject carefully. Then use the resize tool to enter the required dimensions, such as 1200 × 630 pixels for a featured image. Once the dimensions are correct, compress the image to reduce its file size while preserving sufficient visual quality. JPEG is commonly suitable for photographs, while PNG may be useful for graphics that require transparency. WebP is another useful web format that can provide good visual quality at a smaller file size, depending on the image and compression settings. For many blog images, a target of approximately 80–200 KB can be a reasonable starting point, but detailed graphics may need more data to remain clear. There is no universal file-size limit for WordPress blog images. After downloading the optimised image, open it to check its sharpness, proportions, colours, and file size before uploading it to your WordPress Media Library. Add descriptive alternative text that accurately explains the image, use a clear filename such as wordpress-blog-image-size-guide.jpg, and preview the published article on both desktop and mobile devices.
WordPress Image Optimisation Tips, Privacy, and Frequently Asked Questions
A few simple habits can make image management much easier as your WordPress blog grows. First, resize images before uploading them instead of relying entirely on WordPress or your theme to handle oversized originals. WordPress can generate several image sizes automatically, but the original file may still consume storage space, and your hosting or image-delivery setup determines which version visitors receive. Second, avoid compressing an image too aggressively just to achieve the smallest possible file size. Excessive compression can create visible artefacts, blurred text, rough edges, and poor-quality photographs. Always check the final result at the size at which readers will see it. Third, use descriptive filenames and meaningful alt text. A filename such as wordpress-featured-image-size-guide.jpg is easier to understand than IMG_8457.jpg, while alt text should describe the actual image rather than simply repeat a list of SEO keywords. You should also consider privacy when using online image editors, especially when working with unpublished designs, client photography, or confidential creative assets. Browser-based processing can help protect your files when the tool performs the editing locally without uploading the images, but do not assume that every online editor works this way. Check the specific tool’s privacy information and verify its processing behaviour before using sensitive files. This is particularly relevant when choosing tools for regular WordPress publishing. RupaaCompress offers browser-based image utilities designed to simplify image preparation, including resizing and compression, so you can prepare graphics before adding them to your website.
What is the best featured-image size for WordPress? A dimension of 1200 × 630 pixels is a practical starting point for many blogs, especially when social sharing is important, but check your theme’s recommendations.
Will large images slow down my WordPress site? They can increase page weight and contribute to slower loading when unnecessarily large files are delivered to visitors. Resizing, compression, responsive images, and appropriate image delivery can help reduce this problem.
Should I use JPEG, PNG, or WebP? JPEG is suitable for many photographs, PNG is useful when transparency or particular graphic details are required, and WebP is a good option for many website images. Choose a format that your workflow supports and that preserves the required quality.
Can I resize WordPress images without paid software? Yes. Free browser-based tools such as RupaaCompress can help you crop, resize, and compress images before uploading them. By choosing sensible dimensions, keeping file sizes under control, and checking every image before publication, you can create a WordPress blog that looks professional, loads efficiently, and provides a better experience for your readers.