Starting a blog is a great way to share your knowledge, build an online presence, connect with an audience and create new opportunities online. Whether you are interested in technology, travel, business, education, lifestyle or personal experiences, a blog gives you a platform to publish your ideas and reach readers around the world.
If you are wondering how to start a WordPress blog, the good news is that you do not need advanced programming skills or website development experience. With a domain name, reliable web hosting and a few essential WordPress settings, you can create your own professional blog website from scratch.
WordPress is one of the most flexible platforms for building websites because it provides tools for managing content, customizing designs and adding new features without having to code everything yourself.
In this beginner-friendly guide, you will learn how to choose a domain name, purchase web hosting, install WordPress, design your blog, create essential pages, optimize your website for SEO and publish your first article. You will also discover common beginner mistakes and important maintenance tasks that can help your website grow over time.
Quick Answer: How to Start a WordPress Blog
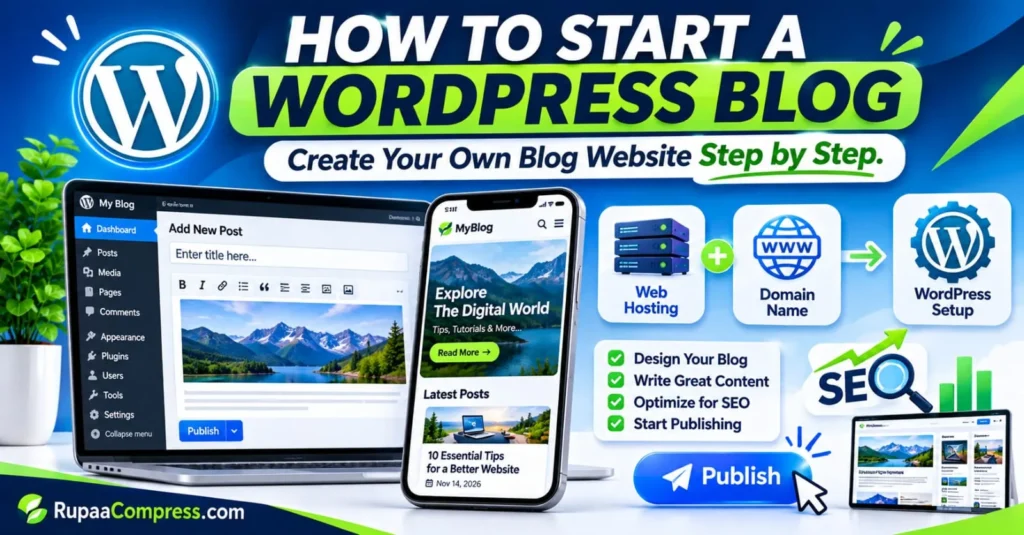
To start a WordPress blog, follow these essential steps:
- Choose a memorable domain name for your website.
- Purchase reliable WordPress-compatible web hosting.
- Connect your domain name to your hosting account.
- Install WordPress and configure the basic settings.
- Select a responsive theme and customize your website.
- Create essential pages and organize blog categories.
- Install an SEO plugin and optimize your content.
- Write, review and publish your first blog post.
- Connect Google Search Console and submit your sitemap.
- Maintain your website with regular updates and backups.
Following these steps will help you build a foundation for a professional blog website.
Why Choose WordPress for Your Blog Website?
Before creating your website, it is important to understand why WordPress is a popular choice among bloggers, content creators and business owners.
WordPress is a content management system (CMS) that allows you to create, organize and publish website content through an administration dashboard. Instead of manually coding every page, you can use its built-in editing tools to write articles, upload images, create pages and manage website settings.
One of the biggest advantages of WordPress is its flexibility. You can start with a simple personal blog and gradually expand it into a professional publication, business website or online store.
Here are some important advantages:
- Easy content management: Create and edit blog posts without advanced technical knowledge.
- Flexible website design: Choose from different themes and customize your website’s appearance.
- Plugin support: Add features such as contact forms, SEO tools, security protection and analytics.
- SEO-friendly structure: Customize page titles, URLs, headings and other important SEO elements.
- Content ownership and control: With self-hosted WordPress, you manage your website files and hosting environment.
- Scalability: Expand your website as your content, audience and business requirements grow.
However, self-hosted WordPress also requires regular maintenance. You are responsible for managing updates, backups, website security and hosting resources.
WordPress.org vs WordPress.com
One of the first decisions beginners need to make is choosing between WordPress.org and WordPress.com.
Although both use WordPress software, their hosting arrangements and management features are different.
| Feature | WordPress.org | WordPress.com |
|---|---|---|
| Hosting | Purchase hosting separately | Hosting is provided |
| Domain | Usually purchased separately | Depends on the plan |
| Plugins | Install compatible plugins | Availability depends on plan |
| Customization | Extensive control | Depends on plan |
| Maintenance | Mostly your responsibility | Some maintenance is managed |
| Costs | Hosting, domain and optional extras | Free and paid plans available |
If you want greater control over your website, custom plugins and hosting environment, self-hosted WordPress.org is a flexible option.
If you prefer a managed service with fewer technical responsibilities, compare the available WordPress.com plans before making your decision.
For beginners who want to build a website that can grow into a content business, self-hosted WordPress is worth considering.
How to Start a WordPress Blog: Essential Requirements
Before installing WordPress, you need to prepare a few essential things. The most important requirements are a domain name, web hosting and access to the WordPress installation process.
1. Choose a Domain Name
A domain name is your website’s address on the internet. For example, example.com is a domain name that visitors can enter into their browsers to access your website.
Your domain name is an important part of your online identity. It should be easy to remember, spell and pronounce.
Consider these tips when selecting a domain:
- Keep the name short, simple and memorable.
- Avoid unnecessary numbers and complicated spelling.
- Choose a name related to your blog’s subject or brand.
- Check availability before purchasing.
- Select an appropriate extension, such as
.comor a country-specific extension. - Avoid names that are too similar to existing brands or websites.
You can register a domain through a domain registrar or a web hosting company that provides domain registration services.
Before purchasing, check the registration price, renewal price, transfer conditions and any additional charges. Some providers offer discounted introductory prices but charge higher renewal fees.
A good domain name should also allow room for future growth. For example, if you plan to publish content about technology, software and online business, avoid choosing a name that only relates to one very specific topic.
2. Select Reliable Web Hosting
Web hosting is a service that stores your website files, images and database on a server and makes them accessible to visitors.
When someone enters your domain name into a browser, the hosting server delivers the website content to their device.
Choosing suitable hosting is important because server performance, reliability and support can influence your website’s overall performance.
For a new blog, shared hosting may be sufficient. As your website grows, you may need to upgrade to a more powerful hosting package.
Before purchasing a hosting plan, look for:
- WordPress compatibility.
- HTTPS and SSL certificate support.
- Regular website backup options.
- Reliable customer support.
- Sufficient storage and bandwidth.
- Good server performance.
- Clear renewal and upgrade policies.
- Access to website management tools.
Compare different hosting providers instead of choosing the cheapest package immediately.
Also check whether the hosting plan includes automatic WordPress installation, email accounts, malware protection and staging features.
WordPress publishes official technical requirements for compatible hosting environments. Review the latest requirements before purchasing because supported software versions can change.
3. Connect Your Domain to Web Hosting
After purchasing your domain and hosting package, the next step is connecting them.
If you purchase both services from the same provider, the connection process may be completed automatically.
If you purchase them separately, you may need to update the domain’s nameservers or DNS records according to your hosting provider’s instructions.
The general process is:
- Log in to your domain registrar account.
- Open the domain management section.
- Find the DNS or nameserver settings.
- Enter the nameservers supplied by your hosting company, if required.
- Save the changes.
- Allow time for DNS changes to propagate.
DNS propagation can take some time, so your domain may not connect immediately.
Once the connection is complete, check that your domain loads correctly using HTTPS.
4. Install WordPress
After your domain and hosting are ready, you can install WordPress.
Most modern hosting providers offer an automatic WordPress installer through their control panel. This makes the installation process easier for beginners.
Follow these general steps:
- Log in to your hosting account.
- Open the website management or application installer.
- Select WordPress.
- Choose the domain where you want to install it.
- Enter your website title.
- Create your administrator username and password.
- Confirm the installation settings.
- Start the installation.
After installation, your WordPress administration dashboard is usually accessible through an address similar to:
yourdomain.com/wp-admin
Enter your administrator login details to access the dashboard.
Always use a strong, unique password. Avoid predictable usernames and never share your administrator credentials with untrusted people.
If your hosting provider does not offer automatic installation, you can follow the official WordPress manual installation documentation.
Create Your Own Blog Website Step by Step
Once WordPress is installed, you can begin building your website. The following steps will help you create a blog that is professional, easy to navigate and simple to maintain.
Step 1: Configure Basic WordPress Settings
Before designing your website, review the main WordPress settings.
Log in to your dashboard and open Settings → General.
Here you can configure:
- Site title.
- Tagline.
- Administration email address.
- Website language.
- Timezone.
- Date and time format.
Choose a clear website title that represents your brand and explain your website’s purpose through a short tagline.
Next, open Settings → Permalinks.
Choose the Post name structure for a simple and readable URL format.
For example:
Recommended URL:
yourdomain.com/how-to-start-a-blog/
Less descriptive URL:
yourdomain.com/?p=245
Readable URLs help visitors understand what a page contains.
Also visit Settings → Reading and check your homepage configuration. If your website is ready to launch, make sure the search engine visibility setting has not accidentally been disabled.
Step 2: Design Your Blog With a WordPress Theme
Your website design influences how visitors interact with your content.
A clean and organized layout makes it easier for readers to navigate your website, discover articles and access important information.
WordPress themes control much of your website’s appearance, including its layout, typography, colors, headers and footers.
Start by choosing a lightweight, responsive theme.
A responsive theme automatically adjusts its layout to different screen sizes, including desktops, tablets and smartphones.
When choosing a theme, consider:
- Mobile-friendly design.
- Readable typography.
- Simple navigation menus.
- Good loading performance.
- Regular theme updates.
- Compatibility with the WordPress block editor.
- Customization options.
You can explore available themes through Appearance → Themes in your WordPress dashboard.
Avoid selecting a theme only because it includes many animations and visual effects. A simple design with clear navigation and readable content is often more effective.
After activating your theme, customize your:
- Website logo.
- Brand colors.
- Header and footer.
- Navigation menu.
- Homepage layout.
- Blog post layout.
- Sidebar, if required.
Keep your design consistent across the entire website.
Step 3: Create Essential Website Pages
A professional blog should include more than articles. Essential website pages help visitors understand your brand, find information and contact you.
Consider creating the following pages:
| Page | Purpose |
|---|---|
| Home | Introduces your website and highlights important content |
| About | Explains your website’s purpose and background |
| Blog | Displays your published articles |
| Contact | Provides a way for visitors to contact you |
| Privacy Policy | Explains how visitor information is handled |
| Terms and Conditions | Describes website usage terms, where relevant |
You can create these pages by opening Pages → Add New.
Write original information that accurately represents your website.
For example, your About page should explain what topics you cover and how your content can help visitors.
Your Contact page can include a contact form or a professional email address.
If you collect visitor information through contact forms, analytics, advertising or other services, your Privacy Policy should explain the relevant data practices.
Add these pages to your website’s navigation menu or footer so visitors can access them easily.
Step 4: Organize Your Blog Categories
Categories help organize your articles into meaningful topics.
When visitors arrive at your website, they should be able to find related content without searching through every published article.
For example, a technology blog might use categories such as:
- Technology.
- Software Tutorials.
- Artificial Intelligence.
- Website Development.
- Digital Marketing.
- Internet Security.
You can manage categories through Posts → Categories.
Start with a small number of relevant categories. Create additional categories when your website has enough content to justify them.
Avoid creating multiple categories that cover almost identical subjects.
You can also use tags to describe specific details within an article, but use them carefully to avoid unnecessary duplication.
Design Your Blog and Optimize for SEO
Creating an attractive website is important, but readers also need to discover your articles through search engines.
Search engine optimization (SEO) involves improving your website’s content, structure and technical setup so search engines can understand your pages and potentially display them in relevant search results.
A well-organized website and useful content provide a stronger foundation for long-term search visibility.
1. Research Keywords Before Writing
Keyword research helps you understand what people are searching for online.
Before writing an article, identify the questions and problems your target audience wants to solve.
For example, someone interested in creating a blog might search for:
- How to start a WordPress blog.
- Best WordPress themes for beginners.
- How to install WordPress.
- WordPress hosting for beginners.
- How to write SEO-friendly blog posts.
- How to customize a WordPress website.
Choose one primary keyword for each article and include related search phrases naturally when they help explain the topic.
You can use keyword research platforms to explore search terms, competition and related questions.
Avoid repeating your primary keyword unnecessarily. Your main objective should be providing a complete and useful answer to the reader’s question.
2. Write SEO-Friendly Titles and Headings
Your article title should clearly explain what readers can expect to learn.
Use descriptive headings to organize your content into logical sections.
A typical article structure includes:
- H1: Main article title.
- H2: Major article sections.
- H3: Smaller topics within each section.
For example, an article about hosting could use:
H1: How to Choose WordPress Hosting
H2: Important Hosting Features for Beginners
H3: Website Speed and Performance
H3: Security and Backup Options
H3: Customer Support and Pricing
This structure makes articles easier to read and helps search engines understand how different sections relate to each other.
Use keywords where they fit naturally, but avoid writing headings that do not accurately describe the content.
3. Optimize Your Blog URLs
A clean URL helps visitors understand what a webpage contains.
For example:
Better: example.com/wordpress-blog-guide/
Less clear: example.com/?p=245
Keep URLs short, descriptive and relevant to the article.
Avoid unnecessary words, random numbers and complicated URL structures.
If you change the URL of an already published article, create an appropriate 301 redirect from the old URL to the new one. This helps visitors and search engines find the updated page.
4. Add Image Alt Text and Optimize Images
Images make blog articles more attractive and help explain information visually. However, large image files can increase loading times.
Before uploading an image to WordPress:
- Resize it according to the required display dimensions.
- Compress it while maintaining acceptable visual quality.
- Choose a suitable image format.
- Give the file a descriptive name.
- Add appropriate alt text.
Alt text describes an image for visitors using screen readers and helps search engines understand the image’s content.
For example:
Image: A laptop showing a WordPress administration dashboard.
Alt text: WordPress dashboard displayed on a laptop for managing blog posts.
Avoid adding unrelated keywords to image descriptions. If an image is purely decorative, it may not need descriptive alt text.
You can use an image compression and resizing tool such as RupaaCompress when preparing website images. Check the tool’s privacy information and processing method before using it for confidential files.
Optimizing images before uploading them can help reduce unnecessary file sizes and improve website performance.
5. Use an SEO Plugin Carefully
SEO plugins make it easier to manage important optimization settings through your WordPress dashboard.
Some popular options include:
- Rank Math SEO.
- Yoast SEO.
These plugins can help you configure:
- SEO titles.
- Meta descriptions.
- XML sitemaps.
- Social media metadata.
- Schema markup.
- Indexing settings.
- Content optimization recommendations.
Choose one SEO plugin that suits your requirements rather than installing multiple plugins that perform similar functions.
Remember that an SEO plugin cannot guarantee higher Google rankings. Content quality, competition, website usability, technical performance and many other factors influence search visibility.
6. Connect Google Search Console
Google Search Console is an important free tool for website owners.
It helps you understand how your website appears in Google Search and identify certain technical or indexing problems.
After launching your blog, follow these steps:
- Open Google Search Console.
- Add your website as a property.
- Complete website ownership verification.
- Open the Sitemaps section.
- Enter your XML sitemap URL.
- Submit the sitemap.
- Monitor indexing and search performance reports.
If you use Rank Math, your sitemap URL may be available through the plugin’s sitemap settings.
You can also use the URL Inspection tool to check the indexing status of individual pages.
Keep in mind that submitting a sitemap does not guarantee that every page will be indexed. Google decides which pages to crawl and include in its search results.
Start Publishing Content on WordPress
Once your website design and essential settings are ready, you can start publishing articles.
WordPress includes a block editor that allows you to add paragraphs, headings, images, lists, buttons and other content elements without manually writing HTML.
Step 1: Create Your First Blog Post
Open Posts → Add New in your WordPress dashboard.
Enter an informative article title and begin writing your content.
Organize your article using headings and short paragraphs so visitors can easily understand the information.
A useful beginner article should:
- Answer one specific question.
- Provide accurate and practical information.
- Include clear headings.
- Use relevant examples.
- Link to useful related articles.
- Avoid unnecessary repetition.
- Provide information that readers can actually use.
For example, if your blog focuses on technology, you could publish beginner tutorials about WordPress, website development, image editing, online security and useful software tools.
Focus on creating original content that solves real problems rather than publishing articles only to include keywords.
Step 2: Add a Featured Image
A featured image represents your article across different parts of your website.
Depending on your WordPress theme, it may appear:
- At the top of the article.
- On your blog homepage.
- In category archives.
- In related article sections.
- In social media previews.
Choose an image that accurately represents the article’s subject.
Before uploading it, make sure the image has suitable dimensions and is compressed for web use.
Also add an appropriate filename, image title and descriptive alt text where relevant.
Check how the featured image appears on both desktop and mobile devices.
Step 3: Review Your Article Before Publishing
Before making your article public, review the entire page.
Use this checklist:
- Is the article title clear and relevant?
- Does the introduction explain what readers will learn?
- Are headings arranged correctly?
- Are spelling and grammar accurate?
- Are paragraphs easy to read?
- Do images display correctly?
- Are internal and external links working?
- Is the URL easy to understand?
- Is the article readable on mobile devices?
- Are SEO title and meta description configured?
You can use the Preview option to check how the article looks before publishing.
Taking a few minutes to review your content can help prevent common publishing mistakes.
Step 4: Publish and Share Your Content
When everything is ready, select Publish and confirm the publishing action.
After publication, open the article in a new browser window and check the live version.
Make sure the page loads correctly, images appear properly and all links work.
You can share your articles through:
- Facebook pages and relevant groups.
- Pinterest.
- LinkedIn.
- Instagram.
- Email newsletters.
- Relevant online communities.
Always follow the rules of each platform and avoid repetitive promotional messages in unrelated communities.
Publishing consistently is useful, but quality should come before quantity. Choose a realistic publishing schedule that gives you enough time to research, write and review every article.
WordPress Blog Setup: Important Tasks to Maintain Your Website
Launching your blog is only the beginning. A WordPress website requires regular maintenance to remain secure, functional and reliable.
Use the following maintenance checklist:
| Maintenance Task | What You Should Do | Why It Matters |
|---|---|---|
| WordPress updates | Install supported updates | Helps maintain security and compatibility |
| Theme updates | Keep your active theme updated | Fixes bugs and improves compatibility |
| Plugin updates | Review and update installed plugins | Reduces known security and compatibility issues |
| Backups | Maintain regular website backups | Helps restore your website after problems |
| Security | Use strong passwords and suitable protection | Reduces unauthorized access risks |
| Performance | Monitor loading speed and optimize images | Improves visitor experience |
| SEO checks | Review indexing and search performance | Helps identify technical and content issues |
| Broken links | Check important website links | Helps visitors access the correct pages |
Before installing major updates, make sure you have a recent backup.
If possible, test significant changes on a staging website before applying them to your live blog.
Also remove themes and plugins that you no longer use. Keeping unnecessary extensions can make website management more complicated and increase maintenance requirements.
Common Mistakes When Starting a WordPress Blog
New bloggers often make avoidable mistakes during the initial website setup. Understanding these problems can save time and help you build a better website.
1. Choosing a Complicated Domain Name
A long or confusing domain name can be difficult for visitors to remember.
Choose a short, memorable name that is easy to spell and suitable for your website’s long-term direction.
2. Purchasing Hosting Without Comparing Features
Not every hosting package offers the same resources and services.
Check WordPress compatibility, server performance, renewal costs, backup options and customer support before purchasing.
3. Installing Too Many Plugins
Installing unnecessary plugins can increase maintenance work and sometimes create compatibility or performance issues.
Use only the plugins your website genuinely needs and review them regularly.
4. Choosing a Heavy WordPress Theme
A theme with excessive animations, scripts and unnecessary features may affect website performance.
Choose a lightweight, responsive theme that provides the design features you actually need.
5. Ignoring Website Security
Weak passwords, outdated software and poor backup practices can put your website at risk.
Use strong administrator credentials, install updates regularly and maintain reliable backups.
6. Publishing Content Without Research
Articles that do not answer readers’ questions are unlikely to provide much value.
Understand your target audience, research the subject and create original content that offers practical information.
7. Ignoring Image Optimization
Uploading large, uncompressed images can increase page size and affect loading performance.
Resize and compress images before uploading them to your WordPress media library.
8. Expecting Immediate Search Traffic
A new blog usually needs time to build content, establish credibility and gain search visibility.
Focus on publishing useful articles, improving website quality and monitoring performance instead of expecting immediate traffic.
Frequently Asked Questions (FAQ)
1. How do I start a WordPress blog from scratch?
To start a WordPress blog, choose a domain name and purchase suitable web hosting. Connect your domain to your hosting account and install WordPress. Configure the basic settings, select a theme, create essential pages, write useful articles and optimize your content for SEO before publishing.
2. Is WordPress free to use?
The WordPress software available through WordPress.org is free and open-source. However, a self-hosted WordPress website generally requires paid web hosting and a domain name. You may also spend money on premium themes, plugins, email services and other optional features.
3. Do I need coding skills to create a WordPress blog?
No. Beginners can create and manage many types of WordPress websites without writing code. The block editor, themes and plugins provide visual tools for designing pages and publishing articles. However, advanced customization and technical troubleshooting may require programming knowledge or professional assistance.
4. What is the difference between a domain name and web hosting?
A domain name is your website’s internet address, such as example.com. Web hosting is the service that stores your website files and database on a server. Both are generally required to operate a self-hosted WordPress website that visitors can access through your domain.
5. How much does it cost to start a WordPress blog?
The cost depends on your hosting provider, domain extension and additional features. A basic self-hosted blog requires a domain name and web hosting. You can begin with a suitable entry-level hosting package and free WordPress themes and plugins. Premium themes, paid plugins and additional services are optional.
Always compare introductory prices with renewal prices before purchasing.
6. Can I start a WordPress blog without hosting?
You can explore WordPress using a local installation on your computer or choose a hosted platform such as WordPress.com. However, if you want to launch a typical self-hosted WordPress website that visitors can access through your own domain, you need web hosting.
7. How can I optimize my WordPress blog for SEO?
Start by publishing useful, original content that answers readers’ questions. Use descriptive SEO titles, organized headings, readable URLs, relevant internal links and appropriate image alt text. Keep your website technically healthy, submit your sitemap through Google Search Console and monitor search performance regularly.
8. Can I make money from a WordPress blog?
Yes. A WordPress blog can support different monetization methods, including display advertising, affiliate marketing, sponsored content, digital products and services.
However, earning money is not guaranteed. Results depend on your audience, content quality, website traffic, monetization method and ability to build reader trust.
9. How often should I publish new blog posts?
There is no fixed publishing frequency that works for every website. Choose a realistic schedule based on your available time and content requirements.
Publishing one or two well-researched articles regularly can be more useful than publishing many low-quality articles without proper research.
10. How long does it take for a new WordPress blog to appear on Google?
The time required can vary. Google needs to discover and crawl your website before deciding whether to index its pages.
Submitting an XML sitemap through Google Search Console can help Google discover your content, but it does not guarantee immediate indexing or search rankings.
Continue publishing useful content and monitor your indexing status through Search Console.
Conclusion
Learning how to start a WordPress blog is a practical first step toward building your own online presence. With a suitable domain name, reliable web hosting and the right WordPress settings, you can create a professional website without advanced programming skills.
Start by connecting your domain, installing WordPress and selecting a clean, responsive theme. Then create essential pages, organize your categories and publish useful articles that answer your audience’s questions.
As your blog develops, focus on SEO, image optimization, website security and regular maintenance. Connect Google Search Console to monitor your website’s performance and identify opportunities for improvement.
Remember that building a successful blog takes time, patience and consistent effort. You do not need to create a perfect website on your first day. Start with a simple design, publish your first useful article, learn from your visitors and improve your website as you grow.