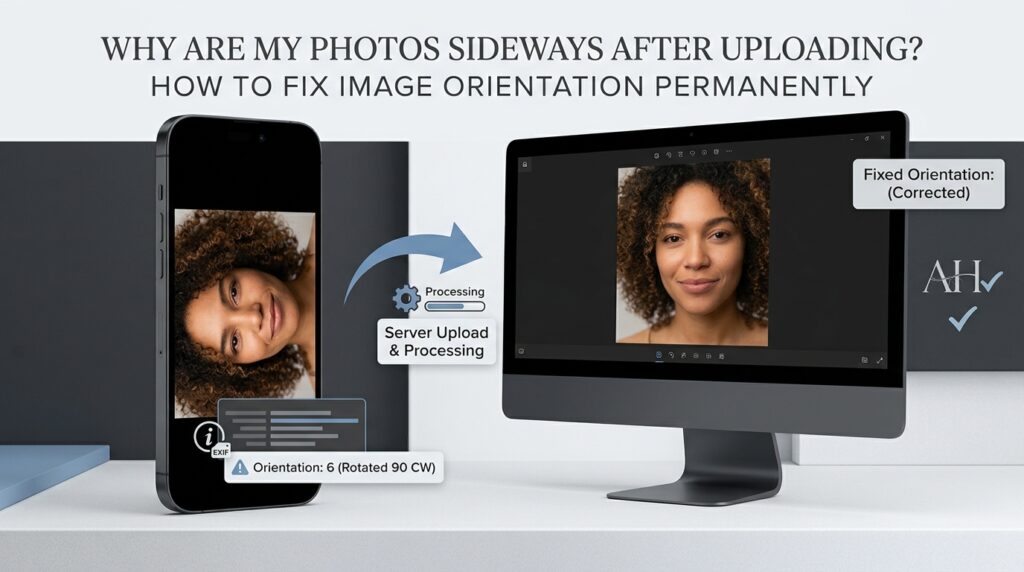
Have you ever taken a photograph with your smartphone, viewed it correctly in your gallery, and then discovered that it appears sideways or upside down after uploading it to a website, sending it through email, or opening it in another application? This can be frustrating, especially when the image is needed for a job application, an online registration form, a business website, a document, or a professional portfolio. The photograph may look completely normal on your phone, so it is natural to assume that the problem belongs to the website or application where the image was uploaded. However, the cause is often related to how digital photographs store orientation information and how different applications interpret that information.
The good news is that most image-orientation problems can be corrected without taking another photograph or installing complicated editing software. Understanding the difference between image rotation and orientation metadata can help you choose the right solution and prevent the same problem from appearing again. This guide explains why photos appear sideways, how EXIF orientation works, the difference between rotating and flipping an image, and how to correct photographs so they display consistently across websites, computers, smartphones, and other applications. It also explains how to process multiple photographs, protect your privacy when preparing image files, and avoid common mistakes that can reduce image quality.
Whether you are a casual smartphone photographer, a student preparing documents, a business owner managing product photographs, or someone who regularly uploads images to websites, learning how to correct image orientation is a practical digital skill. With a suitable browser-based tool such as the RupaaCompress Rotate & Flip Image tool, you can correct the orientation of supported images directly in your browser and prepare files for use across different platforms.
Why Do Photos Sometimes Appear Sideways or Upside Down?
Digital cameras and smartphones do not always store a photograph’s pixels in the same orientation in which the photograph should be viewed. A camera sensor has a physical orientation, and the device can record the way the camera was held when the photograph was captured. Instead of physically rotating every pixel immediately, some camera workflows store the image data together with metadata that describes the intended display orientation. Compatible applications read that information and display the photograph in the correct direction.
This approach is useful because it allows a camera to record photographs efficiently while preserving information about their intended orientation. However, problems can occur when another application processes the image without correctly interpreting or preserving the orientation information. One application may display the photograph upright because it understands the metadata, while another may display the underlying pixel data without applying the required rotation. The result is a photograph that appears normal in one place but sideways in another.
Apple’s official developer documentation explains that image orientation is commonly stored in image metadata and that iOS image-handling APIs can apply the necessary transformation when displaying photographs. The documentation provides an example in which a photograph captured in portrait orientation is stored using the camera sensor’s native landscape orientation, while metadata indicates how the image should be displayed. You can learn more from Apple’s documentation on UIImage orientation.
The issue is not necessarily evidence of a damaged camera, a faulty smartphone, or a problem with the photograph itself. It can simply mean that the application receiving the file handles orientation information differently from the application that originally displayed it. Understanding this distinction is the first step towards correcting the problem reliably.
What Is EXIF Orientation Metadata?
EXIF stands for Exchangeable Image File Format. It is a metadata standard used to store information associated with digital photographs. Depending on the camera and image-processing workflow, this information can include the camera manufacturer, device model, capture date, exposure settings, image orientation, and GPS coordinates. The exact information present in an image depends on how the photograph was created and subsequently processed.
One of the metadata fields is the orientation tag. It communicates the intended orientation of the image, including whether the photograph should be rotated or mirrored when displayed. The original pixel data may therefore have dimensions and an orientation that do not directly match the image’s intended appearance. A compatible image viewer can interpret this metadata and present the photograph correctly without requiring the original pixels to have been physically rearranged in the file.
The difficulty appears when an application, website, image-processing library, or upload workflow does not handle the orientation tag as expected. If the metadata is ignored, removed, or interpreted incorrectly, the photograph may appear in its underlying pixel orientation instead of its intended display orientation. This is one reason that a picture can look correct in a phone’s gallery but appear sideways after being uploaded to another service.
Web technologies also account for image orientation in different ways. The MDN Web Docs reference for the CSS image-orientation property explains how an image’s display orientation can be interpreted using its source information. Image-handling behaviour depends on the software and processing pipeline involved, so the safest approach for a photograph that must be displayed consistently across different environments is to correct its orientation in the image itself rather than relying entirely on external metadata.
What Is the Difference Between Orientation Metadata and Permanent Image Rotation?
Orientation metadata describes how an image should be displayed. Permanent image rotation changes the actual arrangement of its pixels so that the intended orientation is stored directly in the resulting image. These methods can produce a similar visual appearance in a compatible viewer, but they are different technically.
Consider a photograph captured while a smartphone is held vertically. The file may contain the pixel data in one orientation and an EXIF tag indicating that it should be rotated for display. A gallery application that reads the tag shows the person standing upright. If another application ignores the tag, the same photograph may appear on its side. The underlying pixel arrangement has not necessarily been changed, even though the first application displays the photograph correctly.
Permanent rotation addresses this problem by applying the appropriate transformation to the image data and saving the result. After processing, the photograph no longer needs to depend on the original orientation tag to look correct. Applications that open the newly saved file can read the pixels in their intended orientation, reducing the risk of the same sideways-display problem recurring in another environment.
This distinction is especially useful when preparing photographs for websites, email attachments, online applications, presentation slides, scanned documents, and content-management systems. If the destination does not handle orientation metadata consistently, a file with physically corrected pixels is generally a more reliable choice. However, the result should still be checked after processing, because image format, file conversion, and the destination application’s own behaviour can affect the final display.
How to Fix Sideways Photos Online Without Installing Software
A browser-based image rotation tool provides a convenient way to correct photographs without installing a separate desktop application. This is useful when you only need to rotate a few files or when you are working on a computer that does not have advanced photo-editing software. Instead of learning a complete image editor, you can open the relevant tool, select the photograph, apply the necessary rotation, and download the corrected result.
To correct a photograph using RupaaCompress, visit the Rotate & Flip Image tool. Select the image you want to fix from your device, or use the folder-selection option if you have several images to process. The tool supports common image formats, including JPG, PNG, WebP, and AVIF, subject to the browser’s supported decoding capabilities. If your photograph is in a format the tool cannot open in your browser, you may need to convert it first using a compatible image-conversion workflow.
After selecting your file, examine its current appearance and decide which direction it needs to turn. A photograph lying on its side will usually need a rotation of 90° clockwise or 270° clockwise, which is equivalent to rotating 90° in the opposite direction. An upside-down photograph will generally need a 180° rotation. If the image is already upright but appears mirrored, flipping it horizontally may be the correct operation instead.
Choose the appropriate rotation setting and select a suitable output format. For an ordinary photograph, JPG is often a practical option because it is widely supported. PNG may be preferable for graphics that require transparency, while WebP may be useful for supported web workflows. Process the image and inspect the result before downloading it. Confirm that the subject is upright, the image has not been unintentionally cropped, and the output looks correct. When the file meets your requirements, save it and use that corrected version for the intended website, application, or document.
When Should You Rotate a Photo by 90 Degrees?
A 90° rotation is commonly required when a photograph has been displayed sideways. If a person standing upright appears to be lying horizontally, rotating the image 90° in the correct direction will usually solve the problem. The direction matters because rotating clockwise and rotating counterclockwise produce opposite results. If you select the wrong direction, the photograph may remain sideways even though it has been rotated successfully.
The most reliable way to choose the direction is to inspect the subject and determine which side should become the top of the photograph. Imagine a photograph of a person whose head is positioned towards the right edge of the screen. Rotating the photograph clockwise or counterclockwise will move that edge to a different position. Choose the direction that brings the head to the top and the person’s body below it. If the result remains sideways, use the opposite 90° direction.
A 90° rotation also changes the relationship between width and height. A landscape image will generally become portrait-oriented after a quarter turn, while a portrait image will generally become landscape-oriented. This is expected behaviour and does not mean that the picture has lost its quality. However, websites with fixed image layouts may display the resulting dimensions differently, particularly if they crop images automatically. Always check the corrected photograph’s dimensions when the destination has specific requirements.
The RupaaCompress Rotate & Flip tool supports standard 90°, 180°, and 270° rotation settings. These options are useful for photographs that need a precise quarter turn or half turn. When the problem is caused by orientation metadata, the tool re-encodes the image with the corrected pixel orientation so that the resulting file can be displayed consistently across different environments.
How to Fix an Upside-Down Photo
An upside-down photograph requires a different correction from a photograph lying on its side. If the top of the photograph is at the bottom and the bottom is at the top, a 180° rotation will generally bring the image into the correct orientation. This operation turns the image halfway around, moving the top to the bottom and the bottom to the top.
A 180° rotation is useful for photographs captured with a camera held upside down, scanned pages placed in the wrong direction, and images that have been rotated incorrectly during editing. Unlike a 90° rotation, a 180° rotation does not exchange the width and height of the image. A landscape photograph remains landscape-oriented, and a portrait photograph remains portrait-oriented.
It is important not to confuse an upside-down image with a mirrored image. If the photograph’s top and bottom are reversed, rotating it 180° can correct it. If the image appears to be reflected from left to right, a horizontal flip may be more appropriate. These transformations solve different problems, and applying the wrong one can create a result that still looks incorrect. If you are unsure, compare the position of recognizable details, such as the direction of printed text, the location of a person’s watch, or the arrangement of objects in the scene.
Once the image has been corrected, check it at a normal viewing size. If the photograph is intended for an online application or a scanned document, make sure that all text remains readable and that the page orientation is appropriate for its intended use. A technically correct rotation is only useful when it produces an image that works properly for the next task.
Rotation vs Flipping: Which Operation Do You Need?
Rotation and flipping are both image transformations, but they do different things. Rotation turns the image around a point, while flipping mirrors it along a horizontal or vertical axis. Understanding the distinction is particularly important when correcting selfies, mirrored images, scanned documents, and graphics that contain text or directional symbols.
A horizontal flip reverses the image from left to right. It can be useful when a selfie appears mirrored or when you want to create a symmetrical composition. However, this operation also reverses text and other directional details contained in the image. If a shirt contains printed words, for example, a horizontal flip can make those words appear backwards. A mirrored selfie may look familiar to the person who took it, but the resulting image may not accurately represent the scene as other people would see it.
A vertical flip mirrors an image from top to bottom. It can help with certain upside-down scans or artistic compositions, but it is not interchangeable with every rotation. A 180° rotation and a vertical flip can produce very different results because the rotation reverses both horizontal and vertical directions, while the flip changes the image along only one axis. Selecting the appropriate operation is essential when the photograph contains text, logos, signs, or objects whose orientation matters.
For example, if a selfie is upright but appears reversed from left to right, a horizontal flip may help. If the person appears upside down, a 180° rotation is more likely to be the correct solution. If a landscape photograph appears sideways, a 90° or 270° rotation will usually be appropriate. RupaaCompress provides both horizontal and vertical flip options alongside rotation settings, so you can select the transformation that matches the actual problem instead of repeatedly trying different edits.
How to Correct a Slightly Crooked Photo
Not every orientation problem involves a complete quarter turn. Sometimes a photograph is almost upright but the horizon is slightly tilted. This often happens when a photograph is taken quickly without holding the camera level. A building may appear to lean, the horizon may slope across the frame, or a scanned document may sit at a small angle.
In these situations, custom-angle rotation can provide a more suitable correction than a standard 90° or 180° setting. A small rotation of a few degrees may help align a horizon, straighten a document, or improve the visual balance of a photograph. The correct angle depends on the original image and the degree of tilt. It is better to make a small adjustment, inspect the result, and refine it if necessary than to apply an unnecessarily large rotation.
Custom-angle rotation introduces an additional consideration because the corners of a rectangular photograph no longer align perfectly with the edges of the original canvas. To avoid cutting off parts of the image, the processing tool may expand the canvas around the rotated photograph. This can create transparent areas in the corners. The transparent corners are a normal consequence of rotating a rectangular image by an angle other than a multiple of 90°.
If you need a rectangular output without transparent corners, you can crop the image after rotation or fill the extra areas with a suitable background colour. Cropping removes the unused areas but can also remove some image content. Filling the background preserves the rotated image’s boundaries but changes the appearance of the canvas. The best approach depends on whether preserving every part of the original photograph or obtaining a clean rectangular result is more important. You can use the RupaaCompress Crop Image tool after rotating the photograph if you need to remove unwanted transparent edges.
Why Do Photos Look Correct on a Phone but Wrong on a Website?
Smartphones often use camera and operating-system software that understand the orientation information stored with photographs. This allows images to appear in the correct direction even when the underlying pixel data has not been physically rotated. When you view a photograph in your phone’s gallery, the application may automatically interpret the orientation tag and display the intended result.
When you upload the same file to another environment, the file may pass through a different image-processing pipeline. A website may create thumbnails, a content-management system may resize the image, or an application may generate a preview. If one of these processes fails to handle the original orientation correctly, the output can appear sideways or upside down. In other cases, the website may be displaying an old cached preview rather than the newly corrected file.
Apple’s camera and image-processing documentation shows why orientation handling matters in digital photography. Different APIs and capture workflows can store or process orientation information in different ways. Meanwhile, browser technologies have their own methods for interpreting orientation when displaying images. These implementation differences make it useful to correct the actual pixels when preparing files for environments that may not interpret metadata consistently.
If a photograph looks correct on your phone but wrong after uploading it, do not immediately assume that you need to take another picture. Open the original file in an image tool that handles orientation correction, apply the appropriate rotation, and save the corrected output. Re-upload the newly saved file rather than the original. If the destination still displays the previous orientation, remove the old upload where possible and check whether the application is showing a cached version. This process helps distinguish an image-orientation problem from an issue with the website’s display or caching behaviour.
How to Fix Sideways Images on iPhone
iPhone users can rotate photographs directly in the Photos app. Apple’s official support guide explains how to crop, rotate, flip, and straighten images using the built-in editing tools. To correct a photograph, open the image in Photos, tap the edit control, and then open the cropping and rotation tools. You can use the rotation button to turn the image by 90°, select the appropriate framing, and save the result. Apple’s instructions are available in its official guide to cropping, rotating, flipping, and straightening photos on iPhone.
For many ordinary photographs, this is sufficient. However, if the corrected image must be used across different websites or applications, it is still important to verify the saved output. Some workflows may preserve edits as editing instructions or apply orientation corrections through metadata, while others create a newly encoded image. The details can depend on the application and the image format involved. If the photograph continues to appear incorrectly in another application, creating a newly encoded copy with corrected pixels can help remove reliance on the original orientation information.
A browser-based tool can be useful when you need more control over rotation, flipping, output format, or batch processing. For example, if you have several iPhone photographs that must be prepared for an online form, you can select the supported files, apply the required correction, and download the processed versions. If the original photographs use HEIC and your browser or selected tool cannot decode them, convert them to a supported format first. The RupaaCompress Convert Image tool can be useful for preparing a compatible image format, depending on the file and browser’s decoding support.
How to Rotate and Flip Images on Windows
Windows users can also correct photographs using built-in image-editing software. Microsoft’s official Photos application provides tools for cropping, rotating, flipping, and adjusting photographs. Microsoft documents these editing features in its Photos app guide. This can be a convenient option if you only need to correct one or two images and prefer not to use an online tool.
Open the photograph in the Photos application and enter the editing interface. Select the rotation control to turn the image until it appears upright. If the photograph is mirrored rather than rotated, use the flip option where available. Inspect the result and save the edited version. When the image is being prepared for a professional document, online application, or website, check that the saved output is correctly oriented outside the editing interface as well.
A browser-based solution may be more convenient when working with many images, switching between devices, or using a computer without your preferred editing software. RupaaCompress allows you to select multiple images or a folder, apply rotation and flipping settings, and download the processed files. Because the files are processed locally in the browser according to the site’s stated design, you can use the tool without uploading the image files to its image-processing servers.
The main advantage of choosing the correct tool is not that one application is always better than another. It is that you can select the method that matches the task. For an individual photograph, built-in software may be enough. For a large collection of images that need the same correction, batch processing can save considerable time.
How to Rotate Hundreds of Images at Once
Correcting one photograph takes very little time, but managing a folder containing hundreds of images can become tedious if each file must be opened, rotated, saved, and checked separately. This is a common issue for photographers, event organizers, businesses, document-processing teams, and people who manage large personal photo collections. If many images have the same orientation problem, batch processing can make the workflow much more efficient.
Batch image processing allows you to select multiple files or a folder and apply the same settings to all the selected images in one operation. For example, you may have a folder of scanned pages that must all be rotated 90° clockwise. Rather than repeating the same action for every file, you can select the entire collection and apply the required rotation. The same approach can be used when preparing a series of photographs for a website, correcting consistently oriented product images, or organizing a collection before sharing it with another person.
RupaaCompress supports file selection, folder upload, batch processing, and ZIP downloads in its Rotate & Flip tool. This means you can process a group of supported images together and retrieve the results in a single archive. The approach is particularly useful when the files all need the same transformation. However, batch processing assumes that the selected settings are appropriate for every image. If some photographs are upright while others are sideways, applying the same rotation to all of them may cause additional errors.
Before processing a large collection, inspect a sample of the images and determine whether they require the same correction. If the orientation problems vary, separate the photographs into groups and process each group with suitable settings. After processing, inspect representative output files and verify that the filenames, format, dimensions, and visual orientation meet your requirements. On mobile devices, large batches and custom-angle rotations may be slower because the browser must process image data locally. For particularly large collections, a desktop computer can provide a more comfortable workflow.
How Image Rotation Affects Quality and File Size
Rotating an image by 90°, 180°, or 270° does not inherently require reducing its pixel dimensions, although a quarter turn exchanges the width and height. A photograph measuring 4000 pixels wide and 3000 pixels high will generally measure 3000 pixels wide and 4000 pixels high after a 90° rotation. The total number of pixels remains the same, and the aspect ratio changes direction rather than becoming distorted.
However, the process of saving a corrected image can affect file size and quality. When a tool re-encodes a photograph, the resulting file may use different compression settings or an entirely different image format. If a JPG photograph is re-encoded using lossy compression, some image information may be lost depending on the quality setting. A PNG or other lossless output may preserve the encoded pixel information more precisely, but the resulting file may be larger. The exact outcome depends on the original image, the output format, and the settings used.
For the best results, avoid repeatedly rotating and saving the same JPG file when one operation would be sufficient. Each new lossy encoding can potentially introduce additional compression artefacts. Instead, start from the original file, apply the required rotation and any necessary flip in a single editing operation, choose the appropriate output settings, and save the corrected version. This helps limit unnecessary re-encoding and keeps your workflow easier to manage.
If you need to reduce the file size after correcting the orientation, do it as a separate optimization step. You can use the RupaaCompress Compress Image tool to prepare a smaller version for email or website use. If the corrected image is larger than necessary for its intended display, the Resize Image tool can help you adjust the dimensions. Keep the original unmodified file so that you can produce a higher-quality version later if needed.
Correcting Scanned Documents and PDF Source Images
Image-orientation problems are not limited to smartphone photographs. Scanned documents can also appear sideways or upside down when pages are scanned with the wrong orientation or processed by different software. This can make a document difficult to read and can create problems when the image is inserted into a report, presentation, online application, or PDF.
For a single scanned image, determine the intended reading direction and apply a 90° or 180° rotation as necessary. If a page appears upright but the text is reversed, check whether the image has been mirrored rather than rotated. This is especially important for scans of documents containing numbers, signatures, diagrams, and other elements that need to remain accurate. A correctly oriented page should not distort the text or alter the meaning of the original content.
If an image is slightly crooked, custom-angle rotation may be useful, but inspect the page after processing because the operation may introduce transparent corners or require cropping. Preserve all necessary text, signatures, stamps, and document boundaries. A clean result is important, but it should not come at the expense of information contained in the original document.
For multi-page documents, remember that rotating an image file is not the same as rotating an entire PDF document. If the problem exists in a PDF, a suitable PDF editor may be required to rotate the relevant pages. If the PDF was created from individual image files, you can correct those images first and then create a new document from the corrected versions. This distinction helps you choose the right tool rather than attempting to solve a document-level problem using an image-only editor.
Image Orientation and Privacy: What Happens to EXIF Metadata?
EXIF metadata can contain useful information about a photograph, including capture time, camera settings, and, where recorded, geographical coordinates. This information helps organize photographs and can be valuable to photographers who need to understand the technical details of their images. However, some metadata may reveal information that you do not intend to share publicly. A photograph’s GPS coordinates, for example, could reveal where the image was captured if that information is embedded in the file.
When an image is re-encoded by an editing tool, metadata may be removed as part of the process. This can be beneficial when preparing photographs for public sharing because the output may no longer contain certain details from the original file. RupaaCompress states that its Rotate & Flip tool strips EXIF metadata, including GPS information and the original orientation tag, when the image is re-encoded. Removing the orientation tag after physically correcting the pixel data helps prevent the saved image from depending on that tag for its display orientation.
However, metadata removal is not always desirable. Professional photographers may need to preserve capture details for their own records, and some workflows use embedded information to organize or identify photographs. If such details are important, keep the original file securely stored and review the processed file before using it. You should also remember that removing EXIF data does not remove personal information visibly shown in the photograph itself. A picture of a document, address label, computer screen, or other sensitive subject may still contain private information even after its metadata is removed.
RupaaCompress describes its processing as local to the browser, without uploading image files to its processing servers. This can be useful when handling photographs that you prefer to keep on your device. Nevertheless, privacy depends on the complete workflow, including the information visible in the image, the destination where the corrected file is shared, and whether you need any of the original metadata for future use.
How to Avoid Common Image-Rotation Mistakes
One common mistake is rotating a photograph in the wrong direction. A 90° clockwise rotation and a 90° counterclockwise rotation produce different results, so it is important to inspect the subject before selecting a direction. Another mistake is rotating an image when the problem is actually a mirror effect. A mirrored photograph may have the correct vertical orientation but reversed text or objects. In that case, a flip operation may be more appropriate than another rotation.
A further mistake is repeatedly saving a compressed JPG file during the correction process. Re-encoding may reduce image quality depending on the chosen settings, especially when the file is saved multiple times using lossy compression. Starting from the original file and completing the necessary transformations in one operation is generally a better approach. If the file also needs to be resized, cropped, or compressed, plan those operations so that unnecessary repeated encoding is avoided.
It is also easy to overlook the effect of custom-angle rotation on image boundaries. Rotating a rectangular photograph by a few degrees may create transparent corners, which can become visible when the image is placed against a coloured background or converted to a format that does not support transparency. If you need a rectangular output, decide whether cropping or filling the corners is more suitable. Inspect the finished image to make sure important details have not been removed.
Finally, do not assume that a successful preview guarantees that every other application will display the file correctly. Download the processed image and open it independently before uploading it to another website or including it in a document. If the destination retains an old preview, check whether it is showing a cached version. If the source format is unsupported by the destination, convert the corrected photograph to a compatible format and verify it again. A few checks at the end can save time and prevent the same orientation problem from appearing in the final result.
How to Choose the Best Output Format After Rotation
The best output format depends on the type of image and how it will be used. JPG is commonly suitable for ordinary photographs because it provides broad compatibility and efficient lossy compression. PNG can be better for graphics that require transparency or lossless image representation. WebP is useful for compatible website workflows because it supports efficient compression and transparency, while AVIF can be an option in environments that support it.
If the image is a photograph intended for an online application or a document, check the accepted formats before saving the corrected file. Some systems accept only JPG or PNG, while others support a wider selection. Choosing an unsupported format can cause an upload to fail even when the orientation is correct. If the destination specifically requires JPG, select JPG as the output format. If the image includes transparent areas after custom-angle rotation, PNG or WebP may be more appropriate unless you intentionally want to fill those areas with a solid background.
Conversion should be treated separately from orientation correction. Changing the output format can improve compatibility, but it will not necessarily reduce file size or preserve every visual detail. If you need a smaller file after rotation, compare the resulting size and choose compression settings that match the destination’s requirements. For important photographs, retain the original and make a separate optimized copy rather than permanently replacing the source.
The RupaaCompress Convert Image tool can help prepare supported images in a different output format, while the compression and resizing tools can be used when the final image also needs to meet file-size or dimension requirements. Combining the appropriate operations allows you to correct orientation and prepare a file that is ready for its intended use.
Correct Your Photos with RupaaCompress Rotate & Flip
A sideways or upside-down photograph can be caused by the way orientation is recorded, interpreted, or processed rather than by a damaged image. Understanding EXIF orientation helps explain why a photograph can look correct in one application and wrong in another. When the image needs to display consistently across websites, document editors, and other applications, applying the required transformation to the actual image data can be a reliable way to solve the problem.
The RupaaCompress Rotate & Flip Image tool allows you to rotate supported images by 90°, 180°, or 270°, apply custom-angle rotations, and flip photographs horizontally or vertically. It supports batch processing, allowing you to correct multiple files in a single workflow. The tool runs in the browser according to the website’s stated processing model, which means image files are handled locally rather than uploaded to its image-processing servers.
If your photograph also needs to be cropped after rotation, you can use the Crop Image tool. If it must be converted to another format, visit the Convert Image tool. For photos that need to be made smaller before being shared or uploaded, the Compress Image tool provides an additional step in the workflow. These tools address different needs, so choose only the operations necessary for the image you are preparing.
Instead of taking another photograph or repeatedly trying different settings in several applications, identify whether the problem requires rotation, flipping, or a correction to the underlying orientation information. Start with the original file, apply the appropriate transformation, inspect the saved output, and keep an unmodified copy for future use. Visit RupaaCompress to correct image orientation and prepare photographs for websites, personal documents, business projects, and everyday sharing.
Frequently Asked Questions About Sideways and Rotated Photos
Why does my photo look sideways after uploading it?
A photograph may rely on EXIF orientation metadata to tell compatible applications how it should be displayed. If the website or application does not interpret that information as expected, the image may appear sideways or upside down. Re-encoding a corrected copy with the pixels physically rotated can help solve the problem.
How can I permanently rotate a photo online?
Open the photograph in a supported image-rotation tool, select the appropriate rotation angle, choose an output format, and process the image. Download the corrected version and open it independently to verify the result. RupaaCompress provides a Rotate & Flip tool for supported image formats.
Should I choose 90°, 180°, or 270° rotation?
Use 90° or 270° when the photograph is sideways and needs a quarter turn in one direction or the other. Use 180° when the photograph is completely upside down. Inspect the subject before selecting the direction, and check the saved result before using it elsewhere.
What is the difference between rotating and flipping a picture?
Rotation turns the image around a point. Flipping mirrors the image horizontally or vertically. A sideways photograph usually requires rotation, while a photograph that appears reversed from left to right may require a horizontal flip.
Can I rotate multiple photographs at once?
Yes. Batch-processing tools allow you to select multiple images or an entire folder and apply the same rotation settings. RupaaCompress supports batch processing and ZIP downloads. Before processing a large collection, verify that the selected images need the same transformation.
Does rotating a photo reduce its quality?
A rotation of 90°, 180°, or 270° does not inherently require reducing the image’s pixel dimensions. However, saving the corrected image may involve re-encoding, and lossy formats such as JPG can lose some detail depending on the quality settings. To minimize unnecessary quality loss, start with the original file and complete the required transformations in one operation.
Why does my photo become smaller or change shape after rotating it?
A quarter turn generally exchanges the image’s width and height, which is expected. If the image appears stretched, it may have been resized incorrectly or distorted during processing. If the photo has been rotated by a custom angle, the tool may expand the canvas to accommodate the rotated image, creating transparent corners.
Why are there transparent corners after rotating a photo?
Custom-angle rotation changes the alignment of the original rectangular image within its canvas. The tool may add transparent areas to prevent the photograph from being cropped. You can crop the image afterwards or fill the corners with a suitable background colour if you require a rectangular output.
Does rotating an image remove EXIF metadata?
It depends on the software and its processing method. Some workflows preserve or update metadata, while others remove it when the image is re-encoded. RupaaCompress states that its Rotate & Flip tool removes EXIF metadata, including GPS information and the original orientation tag, from processed output images.
Can I fix sideways photos on my phone without installing an application?
Yes. You can use a built-in photo editor or a compatible browser-based rotation tool. RupaaCompress provides a browser-based Rotate & Flip tool that works on supported mobile browsers. Large batches and custom-angle rotations may be more convenient on a desktop computer.
Is rotating an image the same as rotating a PDF page?
No. Rotating an image changes the orientation of an image file, while rotating a PDF page changes the page orientation in a document. If an image is embedded in a PDF, you may need a PDF editor to correct the page itself. If you are creating a new PDF from scanned image files, you can correct the images first and then create the document.
Why does a photograph remain sideways after I have corrected it?
The application may be showing a cached preview, the wrong copy of the file may have been uploaded, or the processing method may not have permanently corrected the image orientation. Download the corrected output, open it independently, and upload the newly saved file. If necessary, clear or replace the old upload.
Which format should I use after rotating my photo?
JPG is often practical for ordinary photographs, PNG is useful for graphics and transparency, and WebP can suit compatible web workflows. The correct choice depends on the image content and the requirements of the destination. Always check the permitted formats before uploading the corrected image.