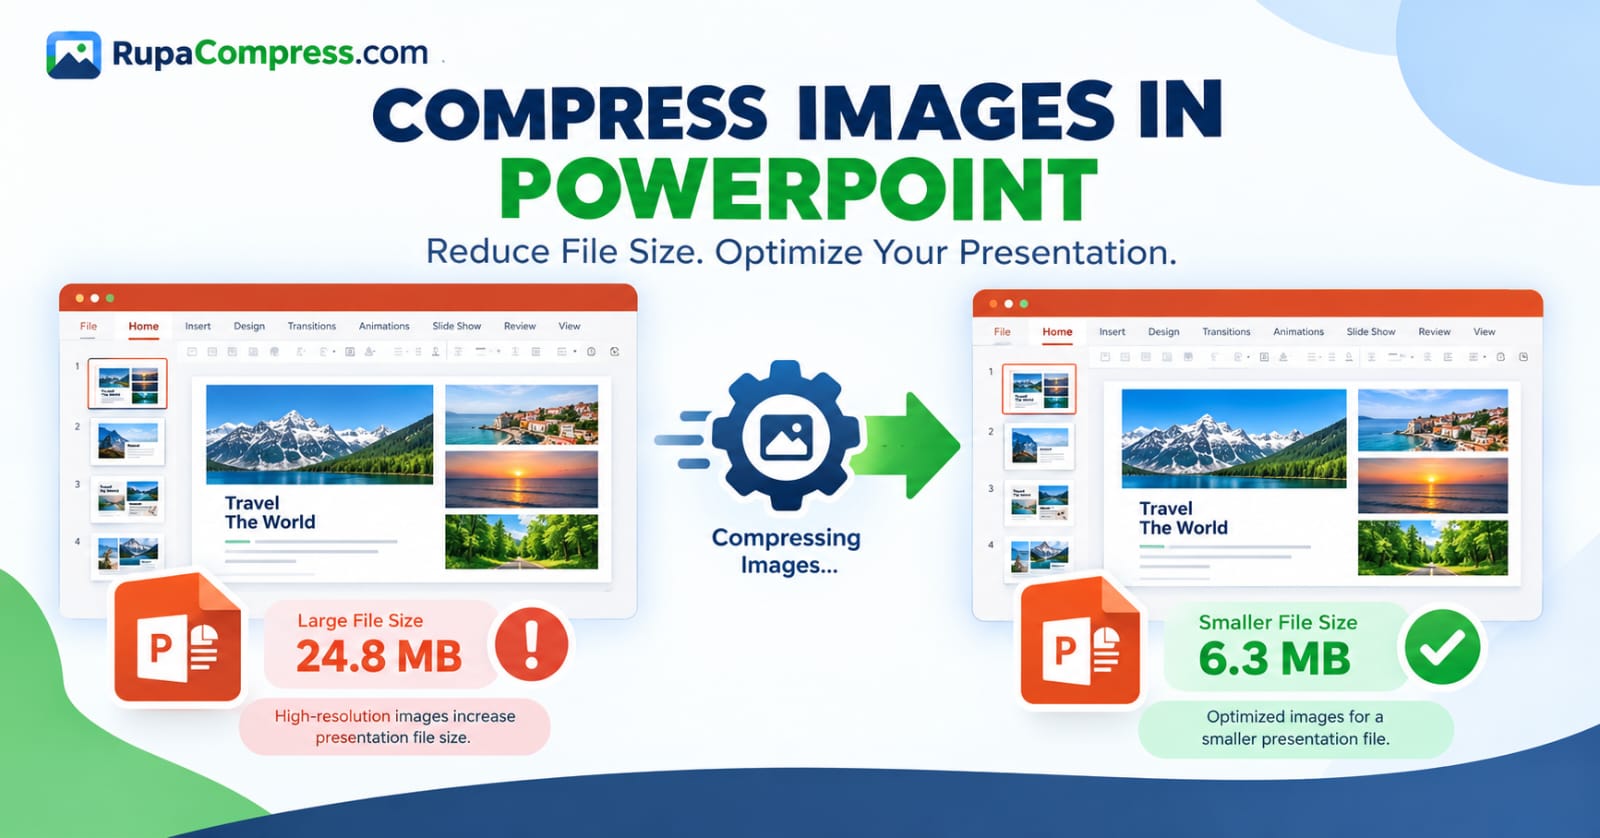
Images are an essential part of the modern digital experience. From business websites and online stores to personal blogs, social media platforms, digital portfolios, and email attachments, images help people communicate information, attract attention, and present ideas more effectively. However, high-quality images can also create a practical problem. Photographs captured using modern smartphones and digital cameras can occupy several megabytes of storage, while screenshots, graphics, and product images can become unnecessarily large when saved using unsuitable formats or dimensions. These large files may take longer to upload, consume more mobile data, fill available storage, and make websites slower to load. They can also cause difficulties when a website, online application, email service, or marketplace imposes a strict file-size limit. Image compression offers a practical solution by reducing the amount of data required to store an image while maintaining the visual quality needed for its intended purpose. Understanding how compression works, which settings to choose, and when to use different image formats can help you create smaller files without making your pictures look noticeably worse.
What Is Image Compression?
Image compression is the process of reducing the amount of digital information required to represent an image. Every digital photograph is made up of pixels, and each pixel contains colour information that contributes to the image’s overall appearance. High-resolution photographs can contain millions of pixels, together representing an enormous amount of visual information. Storing and transmitting all that information can require substantial space, particularly when working with multiple photographs at once. Compression uses different techniques to represent image information more efficiently, reducing the size of the resulting file. Depending on the method used, compression may preserve all original image data or discard some information that is considered less important to the final visual result.
The main objective of practical image compression is to create a file that is small enough for convenient storage, sharing, or online publishing while retaining an acceptable level of visual quality. For example, a photograph originally measuring several megabytes may be compressed into a much smaller file that still looks clear on a smartphone screen or website. The amount of reduction depends on the image’s original format, pixel dimensions, visual complexity, compression settings, and output format. Photographs with smooth backgrounds, simple colour patterns, and relatively low levels of fine detail may respond differently to compression than photographs containing intricate textures, tree branches, hair, small text, or sharp edges. Consequently, there is no single setting that produces the best result for every image. Successful compression involves balancing file size and appearance according to how the image will be used.
It is also important to understand that image compression and image resizing are different processes. Compression reduces the amount of data used to store an image, whereas resizing changes its pixel dimensions. A photograph measuring 4000 by 3000 pixels may remain the same size in terms of dimensions after compression, even though its file size becomes much smaller. Resizing that photograph to 1600 by 1200 pixels reduces its pixel dimensions and may also reduce its file size because fewer pixels need to be stored. Combining the two processes can often produce better results than relying on compression alone. When an image is much larger than the display area where it will be used, resizing it to an appropriate resolution before compression can eliminate unnecessary data while preserving the level of detail that viewers actually need.
Is It Really Possible to Compress an Image Without Losing Quality?
The phrase “compress images without losing quality” is widely used because most people want smaller files without noticeable changes to their photographs. However, it is important to distinguish between mathematical losslessness and visual quality. Lossless compression reduces file size while preserving the original image information. When the image is decoded, the stored information can be reconstructed exactly. Lossy compression, on the other hand, removes some information to achieve greater reductions in file size. Depending on the compression settings, the removed information may be difficult to notice during ordinary viewing, even though the resulting file is not mathematically identical to the original.
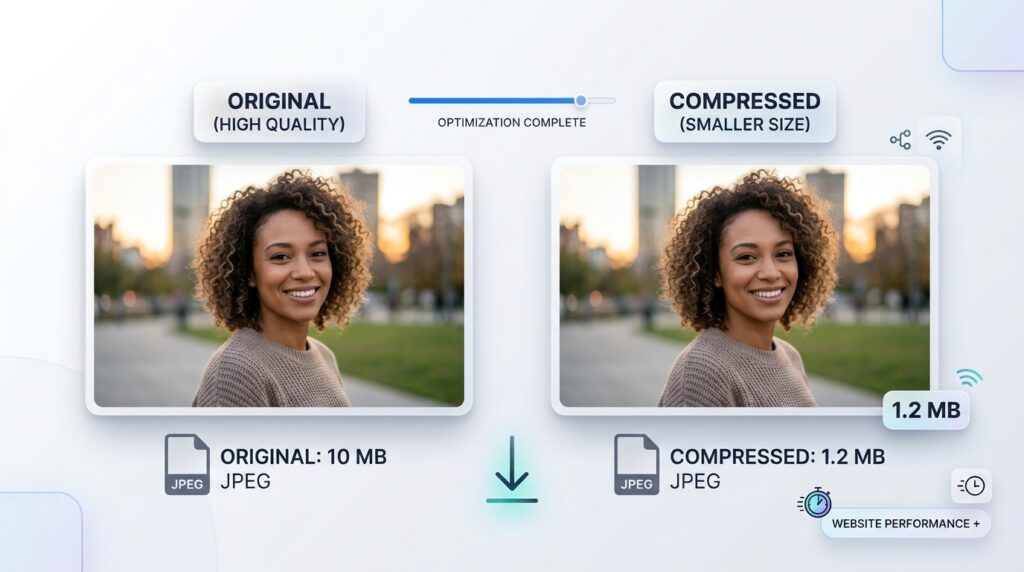
This distinction explains why a carefully compressed photograph can look almost identical to its original version while taking up significantly less storage space. Many photographic formats use lossy compression because the visual information in a photograph can often be represented more efficiently by accepting small differences that viewers may not notice under normal viewing conditions. When the quality setting is appropriate, the reduction in file size can be worthwhile without substantially affecting the viewing experience. However, if the compression level is too aggressive, the photograph may develop visible defects, including blocky patterns, blurry textures, strange outlines, colour distortion, and a loss of fine detail. Once information has been discarded through lossy compression, increasing the quality setting of the already-compressed file cannot restore the original details.
The best approach is therefore to aim for visually lossless results whenever possible rather than assuming that every compression method can preserve every pixel exactly. If you need to maintain the exact original image information, use an appropriate lossless format or workflow. If your goal is to publish ordinary photographs on a website, send pictures through email, or meet an upload limit, carefully selected lossy compression may be more practical. Always keep an unmodified original when image quality is particularly important. That way, you can create different compressed versions for websites, messaging applications, and other uses without permanently replacing the highest-quality source.
Understanding Lossless and Lossy Compression
Lossless compression is particularly useful when precise image details must be preserved. PNG is a familiar example of a lossless image format, making it suitable for logos, screenshots, illustrations, interface graphics, and images that require transparent backgrounds. When a PNG image is decoded correctly, the pixel information represented in that file is preserved. This is valuable when working with clean lines, text, solid colours, and detailed graphics where small compression artefacts can become noticeable. Lossless compression can also be beneficial in workflows where an image must be edited repeatedly, although the file size may remain relatively large, especially for complex photographs.
Lossy compression is often more efficient for photographs because it can reduce file size substantially by discarding selected visual information. JPG is one of the best-known examples of a format that uses lossy compression. WebP and AVIF also support lossy compression, and they can produce efficient results depending on the image, encoding settings, and compatibility requirements. These formats are useful when the priority is to deliver photographs quickly over the internet while maintaining a good visual appearance. The level of compression needs to match the purpose of the image. A small thumbnail does not always require the same quality as a full-screen photograph in a professional portfolio, and a product photograph may require more detail than a decorative background image.
Neither method is universally superior. A lossless file may be unnecessarily large when used for a simple photograph on a website, while aggressive lossy compression may be unsuitable for a logo containing small text or sharp graphical boundaries. The decision should depend on the image’s content and intended use. When preparing a set of website images, you may use a photographic format for product photographs and a lossless or transparency-supporting format for logos and interface graphics. Choosing the correct compression approach at the beginning can prevent unnecessary file-size increases and help you avoid quality problems later.
Why Large Image Files Can Be a Problem
Large image files affect more than the amount of storage they occupy. When someone visits a website, the browser must download the resources required to display the page. If a page contains several large photographs, the browser may need to transfer a substantial amount of image data before the page can be displayed completely. Visitors using slower connections or mobile data may experience longer loading times, while pages containing many unnecessarily large images can consume more bandwidth than necessary. The impact depends on the number of images, their total size, the network conditions, caching, and other factors, but avoiding unnecessary image data is an important part of website optimization.
For an online store, image size can become a particularly important consideration because product listings commonly contain several photographs per item. A store with hundreds of products may need to manage thousands of images covering different angles, colours, sizes, and variations. If each image is larger than necessary, the overall storage requirements and amount of data transferred to customers can grow rapidly. Optimizing these images helps create a more efficient publishing workflow and can improve the experience of visitors who browse product galleries on mobile devices. Website performance is influenced by many other factors, including server response times, scripts, stylesheets, caching, and page structure, so image compression alone cannot solve every performance problem. However, properly optimized images are often an important part of the solution.
The same issue applies to personal use. Email providers and online application systems may restrict the maximum size of attachments or uploaded photographs. A picture that is perfectly suitable for viewing on a computer screen may be too large for a particular form or email attachment. Social media platforms may also reprocess uploaded images, making it useful to prepare files with sensible dimensions and compression settings before uploading them. By reducing unnecessary image data, you can make files easier to share, upload, store, and manage without automatically sacrificing the visual quality that matters.
How to Choose the Best Compression Level
Choosing the right compression level is one of the most important parts of preparing an image. Many image-compression tools provide a quality slider or a similar control that determines the strength of compression for supported lossy formats. Higher quality settings generally preserve more visual information and produce larger files, while lower settings usually create smaller files at the expense of additional image degradation. The relationship is not perfectly linear: reducing a quality value by a particular amount does not guarantee an equivalent percentage reduction in file size. Different images can produce different results even when the same settings are applied.
For ordinary website photographs, a quality setting in the general range of 75 to 85 can be a sensible starting point when using a compatible JPEG-style quality scale. RupaaCompress identifies this range as a practical starting point for many images and recommends checking the before-and-after result rather than selecting a setting without reviewing the output. The actual result depends on the source photograph, the output format, and the encoder’s quality scale, so these values should be treated as guidance rather than universal rules. Some images will look good at lower settings, while photographs containing intricate detail, subtle gradients, or fine textures may need higher settings to avoid visible defects.
If you are compressing photographs for a professional photography portfolio, you may decide that preserving fine detail is more important than achieving the smallest possible file. In that situation, a higher quality setting can be appropriate. Conversely, a small thumbnail used in a compact product grid may not need the same level of detail as a large image that visitors can open separately. If you are preparing images for an online form, the maximum allowed file size may be more important than retaining every subtle visual detail. The correct setting should therefore be chosen according to the destination and the importance of the image, rather than using the lowest available quality value for every photograph.
The most reliable approach is to test a few settings, compare the results, and select the smallest file that still meets your visual requirements. View the image at the size at which people will actually see it. A compressed photograph may look excellent when displayed at a small size but reveal visible artefacts when enlarged. At the same time, inspecting every image at extreme magnification may lead you to reject a file that looks perfectly suitable in its intended context. A practical evaluation should consider both the original dimensions and the final viewing conditions.
Which Image Format Is Best for Compression?
Choosing the right image format can have a substantial effect on file size, quality, transparency, and compatibility. JPG is often a practical choice for photographs because it is widely supported and can produce relatively compact files. It is suitable for portraits, landscapes, travel photographs, and product images that do not require transparent backgrounds. PNG is particularly useful for logos, screenshots, interface designs, and graphics that require transparency or the preservation of sharp edges. However, PNG files containing detailed photographs can be significantly larger than compressed photographic alternatives, so using PNG for every image is not always an efficient strategy.
WebP is a modern image format that supports both lossy and lossless compression as well as transparency. It can provide smaller files than JPEG or PNG for many common web-image tasks, although the exact benefit depends on the image content and encoding settings. This makes WebP a useful option for website owners who want to reduce the amount of image data delivered to visitors. AVIF is another modern format that can achieve highly efficient compression, but encoding speed, application support, and workflow requirements should be considered before adopting it everywhere. For most website projects, the best format is the one that meets the visual requirements while remaining compatible with the systems and platforms where the image will be used.
An important mistake to avoid is assuming that changing a file extension automatically improves an image. Renaming a file from a JPG extension to PNG does not convert its internal image encoding correctly. Proper conversion requires the image to be decoded and then encoded in the chosen output format. Even when conversion is performed correctly, it cannot restore information that was previously discarded through lossy compression. If you convert a compressed JPG photograph into PNG, the resulting file may be larger without showing any improvement in the original detail. If you convert a transparent PNG to JPG, you must also account for the fact that JPG does not support transparency and will require a solid background.
RupaaCompress supports image compression and conversion workflows for formats including JPG, PNG, WebP, and AVIF output where supported by the browser. Its compression tool lets you choose an output format as part of preparing your image. For anyone publishing photographs on the web, comparing JPG and WebP outputs can be a useful way to understand how file size changes at a visually acceptable quality level. You can learn more through the RupaaCompress image compression tool and the RupaaCompress image conversion tool.
Why Resizing an Image Before Compression Often Helps
One of the most effective ways to reduce image file size is to make sure that the image’s pixel dimensions match its intended purpose. Imagine that you take a photograph with a modern smartphone and the resulting image measures several thousand pixels across. If you plan to use that photograph as a relatively small image in a blog article, the browser may not need all the pixels present in the original. Compressing the full-resolution photograph can reduce the file size, but you may achieve a more efficient result by resizing it to a suitable display resolution before applying compression.
Resizing works by changing the number of pixels in the image. When the dimensions are reduced, some of the original pixel information must be resampled into a smaller image. This means that resizing is not simply another name for compression, and reducing the dimensions too aggressively can remove details that would have been useful at larger display sizes. The aim is to eliminate unnecessary resolution, not to make every image as small as possible. A large background photograph may need considerably more pixels than a small icon or thumbnail. Similarly, images intended for high-density displays may require more source pixels than their apparent display dimensions suggest.
It is also important to preserve the image’s aspect ratio when resizing. If a photograph is made narrower without adjusting its height proportionally, or made shorter without adjusting its width appropriately, the content can become stretched or distorted. Faces may appear unusually wide, objects may look flattened, and circular shapes may turn into ovals. To avoid these problems, use a resizing method that preserves the original aspect ratio unless you specifically intend to crop or reshape the composition. Cropping and resizing can be combined when necessary, but each operation serves a different purpose. Cropping removes unwanted areas, while resizing changes the pixel dimensions of the selected image.
The RupaaCompress Resize Image tool allows you to resize images using pixel dimensions or percentages and includes options for maintaining proportions and using common platform presets. This is useful when preparing a collection of photographs for a website, email, or social media platform. A good workflow is to start with the original image, identify the dimensions required for the destination, resize appropriately, and then compress the result. Once the image is ready, review the final file size and visual quality before publishing it.
How to Compress an Image to a Specific File Size
Sometimes the goal is not simply to reduce an image’s file size but to meet a precise upload requirement. Online forms, profile portals, marketplaces, and other services may specify that an image must remain below a maximum size. A photograph that looks excellent but exceeds the permitted limit may be rejected by the system. In these situations, repeatedly changing quality settings manually can be frustrating, especially when you need to prepare several images with different original sizes.
A target-size compression tool can make this process more convenient by adjusting the compression settings to aim for a chosen file size. For example, suppose an application requires a photograph that is no larger than 200 KB. You can begin with the original image, set a target size of 200 KB in a compatible tool, and process the image to see whether the resulting file meets the requirement. RupaaCompress provides a target-file-size option in its compression tool, allowing users to specify a size in kilobytes rather than relying only on the quality slider. This is particularly useful when preparing photographs for web forms or other services with strict size restrictions. The relevant feature is available through the RupaaCompress Compress Image tool.
It is worth distinguishing between kilobytes and kilobits because these terms describe different quantities. File-size limits expressed in KB or MB usually refer to kilobytes and megabytes, while internet connection speeds are commonly described in kilobits or megabits per second. A photograph with a file size of 500 KB contains a different amount of data from an image measuring 500 kilobits, and confusing the two can lead to incorrect assumptions about upload requirements. Before compressing a photograph, read the instructions of the destination carefully and identify whether the limit is a maximum file size, a maximum pixel dimension, or both.
Meeting a file-size target should not be the only consideration, however. If the image becomes visibly damaged when compressed below a strict limit, consider whether resizing it first could help. Reducing excessive pixel dimensions may make it possible to achieve a smaller file with a better visual appearance than applying extremely aggressive compression to the original dimensions. If the image must remain large and highly detailed, the requirements may involve a genuine trade-off between the permitted file size and the desired quality. In that case, test the output and make sure the result remains clear enough to serve its intended purpose.
How to Compress JPG Images Without Making Them Blurry
JPG is commonly used for photographs because it can provide a useful balance between appearance and file size. However, repeated lossy compression can gradually introduce visual artefacts. If a JPG image is opened, compressed, saved, and then compressed again several times, each new encoding may discard additional information depending on the settings used. The resulting photograph may eventually show blurry details, blocky patterns, colour changes, or unnatural edges. This is why it is generally better to begin with the original camera image or the highest-quality available source when preparing a compressed version.
Start by evaluating the image’s dimensions and intended use. If the photograph is unnecessarily large for the destination, resize it before compressing it. Then select a quality setting that provides a reasonable reduction without visibly damaging important details. Photographs containing faces, hair, foliage, patterned clothing, buildings, and text deserve particular attention because compression artefacts can become noticeable around their edges and fine textures. Review the most important parts of the image rather than looking only at the overall colour and brightness. If the photograph is intended for a product page, inspect the product’s edges and distinguishing features. If it is a portrait, examine facial details and hair. The best result is one in which the visual information required by the viewer remains clear.
Avoid assuming that the lowest possible quality setting is the most efficient choice. A very small file may be convenient to upload, but excessive compression can make a photograph appear unprofessional and undermine the information it is supposed to communicate. A slightly larger file with better detail may be preferable, particularly for a portfolio or commercial product image. The aim is to remove unnecessary file weight rather than to destroy the photograph’s most important characteristics. If you have several versions of the same image, compare their appearance and file sizes before deciding which one to keep for publication.
How to Compress PNG Images Efficiently
PNG images are commonly used for graphics that need sharp edges, transparent backgrounds, or lossless image representation. However, PNG files can become large when they contain complex photographic information or high-resolution artwork. The best way to reduce the file size depends on why the image was saved as PNG in the first place. If it is a logo, icon, screenshot, or graphic that requires transparency, switching automatically to JPG may damage the result or introduce a background that should not be there. In such cases, keeping PNG or considering a suitable transparency-supporting alternative such as WebP may be more appropriate.
If the PNG is much larger than the destination requires, start by examining its pixel dimensions. A large screenshot that will be displayed at a smaller size may not need all of its original pixels. Resizing it carefully can reduce the amount of information that must be stored without compromising the details that remain important at the intended display size. For simple graphics, PNG compression and other lossless optimization methods may reduce file size without altering the pixel content. For complex photographic content, however, PNG may remain substantially larger than a well-compressed photographic format. When transparency is not needed and the image is a photograph, converting to JPG or WebP can be a practical alternative.
You should also inspect the result when changing a PNG to another format. Text, thin lines, small interface elements, and transparent edges may look different after conversion, particularly if the new format uses lossy compression. If the image contains a transparent background, preserve transparency by choosing a format that supports it. If you convert the image to JPG, choose an appropriate solid background colour because transparent regions cannot remain transparent in the resulting file. The purpose of compression is to make an image more efficient, not to introduce design problems that affect its usability.
Is WebP Better Than JPG for Website Images?
WebP is a modern image format designed for efficient delivery on the web. It supports lossy compression, lossless compression, and transparency, making it suitable for a range of photographs and graphics. For many website images, WebP can provide a smaller file than JPG at a similar perceived visual quality, although the size difference varies according to the source image and encoding settings. Reducing file size can help limit the amount of data transferred when a page loads, especially when the page contains many images. This makes WebP worth considering for website owners who want to optimize their image libraries while maintaining a good visual experience.
JPG still has practical advantages, particularly broad compatibility with older software, document workflows, and services that expect conventional image formats. If you are preparing a photograph for a system that specifically requires JPG, converting it to WebP will not solve the problem even if the file becomes smaller. The destination’s requirements should always guide the final format. On a modern website, WebP may be an excellent choice, while JPG may remain the safest option for general sharing and applications with stricter format requirements. PNG may be better when the file must preserve transparency and crisp graphical details.
AVIF is another option for web image delivery and can provide highly efficient compression. However, file format support and encoding behaviour should be considered in relation to the audience and software involved. Website developers who control how images are served may have more flexibility to use modern formats than people uploading individual pictures to third-party platforms. If you are preparing a file for an online form, messaging application, or older document editor, verify that the destination accepts your chosen format. If you are optimizing your own website, test your selected format in the actual publishing environment rather than assuming that the smallest local file will automatically produce the best result in every situation.
How to Compress Images for a Website
Website image optimization begins before the compression process. First, identify where the image will appear and estimate the dimensions needed for that location. A small image displayed inside a card or product thumbnail rarely needs the same resolution as a full-width hero photograph. Next, select a suitable format based on the image’s content. Photographs can often use a lossy photographic format, while logos and graphics may require transparency or lossless quality. After selecting the dimensions and format, adjust the compression settings and inspect the result. This process makes image optimization more deliberate and reduces the likelihood of delivering unnecessarily large files.
It is also helpful to consider the total collection of images on a page rather than optimizing every image independently of the page design. A page containing twenty photographs will transfer more image data than a page containing only one, even if each individual image is reasonably optimized. Galleries, blogs, travel websites, and e-commerce catalogues may therefore benefit from consistent image-processing workflows. For example, a travel blog may use larger images for featured photographs and smaller images for previews. A product catalogue may use similar dimensions for all product thumbnails so that the layout remains consistent. Matching image dimensions to actual display needs can prevent wasted resolution and reduce the overall weight of a page.
Compression is only one part of website performance. Responsive image delivery, caching, suitable loading behaviour, efficient page design, and the way a site serves its assets can also affect the user experience. On some websites, the browser may download different image variants depending on the visitor’s screen size, while others serve the same file to every visitor. If you control the website, consider how your images are delivered as well as how they are prepared. If you are simply uploading images to a blogging platform or website builder, focus on using appropriate dimensions, a suitable format, and reasonable quality settings before the upload. These practical steps can make image management easier without requiring advanced development knowledge.
How to Compress Images for Email and Messaging
Images are frequently shared through email, messaging applications, and online collaboration platforms. High-resolution photographs are useful when someone needs to inspect fine detail, but they may be unnecessarily large for routine communication. A photograph intended to provide a quick visual update may not need the same resolution as a photograph intended for printing or professional editing. Preparing a smaller version can make attachments easier to transmit and may help when the email service or recipient has limited storage or connection speed.
The first consideration is how the recipient will use the image. If it is only needed for viewing on a screen, a reasonably sized and compressed photograph may be sufficient. If the recipient needs to print the image, zoom into fine details, or continue editing it, you should retain more of the original quality and dimensions. Compressing a photograph too aggressively may save space but create difficulties for the recipient if they later need details that have been removed. When necessary, keep an original copy for future delivery and use the compressed file only for routine communication.
For groups of photographs, consider using consistent dimensions and settings. If you are sending a group of event photographs or product images, reducing excessive dimensions and selecting an appropriate output format can make the entire collection more manageable. However, avoid converting every image to the same format without considering transparency and other requirements. A group of photographs may work well as JPG or WebP, while graphics and logos may need different treatment. By matching the compression method to the image content, you can make files easier to share while preserving the details that matter to the recipient.
How to Compress Multiple Images at Once
Compressing a single photograph is usually straightforward, but managing a large image collection can become time-consuming if every file must be handled separately. A photographer may need to prepare an entire gallery, an online shop may need to optimize dozens of product pictures, or a website administrator may need to reduce the file sizes of a large folder of existing images. Repeating the same steps for each photograph increases the amount of manual work involved and may lead to inconsistent output settings across the collection. Batch image processing addresses this problem by allowing several images to be processed with the same chosen settings in one workflow.
A good batch workflow begins with a clear understanding of the files being processed. Group together images that have similar requirements, such as product photographs intended for the same website area or pictures that need the same file-size limit. If a single folder contains very different image types, consider testing representative files before processing everything together. A compression setting suitable for photographs may be inappropriate for screenshots or transparent graphics. Reviewing a few sample outputs can help you confirm that the settings are reasonable before applying them to the full collection.
RupaaCompress supports selecting multiple images or uploading a whole folder for batch processing, with the option to download the resulting files individually or as a ZIP archive. Its compression workflow also provides controls for quality, target file size, and output format. These features can be useful when handling large collections without repeatedly opening a separate editing session for every photograph. Visit the RupaaCompress Compress Image tool to prepare image files for websites, emails, or other uses.
After processing the batch, review the results instead of assuming that every output is automatically suitable. Check that the output files open correctly, that the main subject remains clear, and that the dimensions and formats match the requirements of the destination. If some images appear noticeably worse than others, those files may need separate treatment using different settings or output formats. Batch processing saves time, but image quality still depends on making appropriate decisions about the source material and the intended result.
Why You Should Always Keep Your Original Images
A reliable image-optimization workflow begins with preserving your original files. The original photograph is often the best source for future editing, re-cropping, resizing, printing, or producing alternate formats. If you replace the original with a low-quality compressed version, you may find that the image no longer contains enough detail for a later purpose. For example, a small photograph optimized for a website thumbnail may look acceptable when displayed in a compact layout but become visibly soft when used in a larger banner. Having the original file allows you to produce a new version without starting from an already degraded source.
Maintaining separate originals and optimized copies is particularly important when processing large batches. A clear naming system can help you distinguish source images from files prepared for web publishing, email sharing, or social media. You can preserve the original filenames and add a descriptive suffix to the output when necessary, making it easier to identify which version should be used for each purpose. The exact naming approach is less important than having a consistent method that prevents the wrong version from being used accidentally.
Original files may also contain metadata that is useful for your workflow. Depending on the camera and editing software, this information can include capture dates, camera settings, GPS coordinates, and copyright-related details. Image-processing tools may remove some or all embedded metadata when they re-encode an image. This can be beneficial for privacy, particularly when you are sharing photographs publicly, but it may also remove information you intended to retain. RupaaCompress states that its image-processing workflows strip EXIF and GPS metadata when images are re-encoded in its browser-based tools. If metadata is important to your professional process, retain the originals and check the output before publishing it. This helps you balance the benefits of optimization and privacy with the need to maintain useful records.
Image Compression and Privacy: Why Local Processing Matters
Uploading an image to an online service can involve transferring the file to a remote server for processing. Depending on the service and its policies, files may be stored temporarily, retained for a longer period, or handled according to other data-processing rules. This can be a consideration when working with private photographs, confidential business materials, internal project images, or documents that contain personal information. Before using any online image tool, it is sensible to understand where processing takes place and how the service describes its handling of user files.
Browser-based image processing offers another approach. In a local-processing workflow, the browser uses the device’s own resources to process the image rather than uploading the image file to a remote server for that operation. RupaaCompress states that its image tools perform processing locally in the browser, without uploading users’ image files to its servers. This approach can be convenient when handling personal photographs or business assets that you prefer to keep on your device. It also avoids the need to wait for an image upload before processing can begin, although the actual processing speed still depends on the size and number of files and the capabilities of your device.
Local processing does not remove every privacy consideration from internet use. A website may still load analytics, advertising, or other page resources, and local image processing does not automatically guarantee that a file is safe to publish. Metadata, visible details within the photograph, and information in the image itself may still reveal something about its subject. Before sharing a photograph publicly, consider whether it contains location information, personal documents, account details, or other sensitive content. You should also avoid treating metadata removal as a substitute for checking the visible contents of the image.
The important point is that privacy depends on both the tool’s design and the user’s decisions. Understanding whether a service processes files locally or remotely gives you useful information when selecting a workflow. Keeping original files secure, checking the output, and considering metadata before publishing can further reduce unnecessary exposure. You can read more about the tools and their processing approach on the RupaaCompress website.
Common Image Compression Mistakes and How to Avoid Them
One of the most frequent mistakes is compressing an image repeatedly instead of returning to the best available source. Repeated lossy encoding can gradually reduce visual quality, and converting a low-quality photograph to a different format does not reconstruct details that have already disappeared. Another mistake is choosing an extremely low quality setting simply because it creates a smaller file. A small file is not useful if the resulting photograph is too blurry to communicate the information it was intended to show. A better approach is to begin with a suitable source file, choose appropriate dimensions, apply moderate compression, and inspect the final result before accepting it.
Using the wrong format is another common problem. PNG is valuable for transparency and lossless graphics, but it may produce unnecessarily large files for ordinary photographs. JPG can be efficient for photographs, but it cannot preserve transparent backgrounds. WebP and AVIF can provide efficient alternatives in supported workflows, but the destination must accept the chosen format. A successful compression process takes these differences into account rather than trying to force every image into a single format regardless of its content.
Many users also overlook image dimensions. Compressing a very large image does not necessarily make it appropriate for every destination, particularly if the resolution is far beyond what the layout requires. Conversely, making an image extremely small in pixel dimensions may cause it to look blurry when displayed at a larger size. Resizing and compression should therefore be considered together. Select dimensions that fit the intended display, preserve the aspect ratio, and then adjust the output quality. This usually creates a more sensible balance than using aggressive compression to solve every file-size problem.
Finally, failing to inspect the final output can cause avoidable issues. The file may be smaller but no longer meet the destination’s requirements, or a conversion may have introduced a solid background where transparency was needed. The image might also have lost metadata that was important for the user’s records. Before publishing or sending the result, confirm that the file opens, the format is correct, the subject remains clear, and the file size satisfies the relevant limit. This final check is a small step that can prevent problems later.
A Practical Workflow for Better Image Compression
A good image-compression workflow starts by identifying the purpose of the image. A photograph intended for a blog, an online form, a product catalogue, a professional portfolio, and a social media post may need different dimensions and quality settings. Once the destination is known, examine the original format and decide whether the image requires transparency, lossless detail, or efficient photographic compression. The next step is to choose suitable pixel dimensions. Avoid retaining excessive resolution when it provides no practical benefit, but make sure the final image remains sharp at its intended display size.
After resizing where necessary, choose an appropriate output format and compression setting. Compare the original and compressed versions, paying attention to fine details, edges, colour transitions, and the main subject. If the file needs to meet a strict size limit, use a target-size feature where available, then check that the resulting image is still clear enough for its intended use. If a particular image does not produce a satisfactory result, consider changing the dimensions or format instead of repeatedly lowering its quality. Maintain your original file separately so that you can create another version later without relying on the compressed output.
For larger collections, test the workflow on a small group before applying the settings to every file. Once the results are satisfactory, batch processing can reduce the amount of repetitive work and help maintain consistent settings. Review the completed files, verify that they use the required formats, and keep a clear distinction between original and optimized copies. This method is practical for individuals, photographers, online sellers, designers, website owners, and anyone who needs to prepare images regularly.
Compress Images Online with RupaaCompress
Reducing image file sizes does not need to be a complicated process. By understanding the difference between lossy and lossless compression, selecting the right image format, resizing oversized photographs, and reviewing the final results, you can prepare smaller images while preserving the visual details that matter. The key is not to pursue the smallest possible file at any cost, but to achieve a sensible balance between size, quality, compatibility, and privacy. A well-compressed image should remain suitable for its intended use, whether that means appearing clearly on a website, meeting an upload limit, fitting into an email attachment, or being shared through a messaging application.
RupaaCompress brings several common image-processing tasks together in a browser-based workspace. Its Compress Image tool supports quality-based compression and target file sizes, while the Resize Image tool helps prepare images with suitable dimensions. The Convert Image tool can be used when the source format does not meet the requirements of your destination. RupaaCompress also supports batch workflows, which can be helpful when processing larger collections of photographs. The website describes its image processing as local to the browser, without uploading the image files to its servers, giving users an alternative to workflows that require transferring images to a remote service.
Whether you are preparing a single photograph for an online application or optimizing an entire folder for a website, a simple and consistent process can save time and reduce unnecessary file sizes. Start with the best original you have, select appropriate dimensions, choose a suitable format, and test the compression settings before downloading the final image. Explore RupaaCompress to put these methods into practice and make your image workflow more efficient, whether you are working with personal photographs, creative projects, or business content.
Frequently Asked Questions About Image Compression
Can I reduce an image’s file size without changing its dimensions?
Yes. You can often reduce a photograph’s file size by changing its compression settings or converting it to a more efficient format while keeping the same pixel dimensions. The result depends on the original format and the selected output settings. Lossy compression may change some image information even though the width and height remain unchanged. If exact pixel preservation is essential, use a suitable lossless method instead.
Does compressing an image reduce its resolution?
Not necessarily. Resolution in the sense of pixel dimensions remains unchanged when you compress an image without resizing it. However, lossy compression can reduce fine detail and introduce artefacts even when the pixel dimensions stay the same. Resizing, in contrast, changes the number of pixels in the image and can reduce its dimensions directly.
What is a good image quality setting for websites?
For many photographs, a quality setting around 75 to 85 on a compatible encoder’s quality scale is a reasonable starting point. The best value depends on the original image, output format, dimensions, and intended display size. Always compare the output rather than relying on a single quality value for every image.
Is JPG or PNG better for reducing file size?
JPG is often more suitable for photographs because its lossy compression can produce compact files with acceptable visual quality. PNG is generally better for graphics that need transparency, sharp boundaries, or lossless representation. The most appropriate format depends on what the image contains and how it will be used.
Can I compress an image to exactly 200 KB?
A tool with a target-size feature can adjust its compression settings to aim for a specified file size, such as 200 KB. The final result should still be checked before use, especially when the destination has a strict maximum limit. If the image becomes visibly damaged, resizing it before compression may help.
Does converting JPG to PNG improve image quality?
No. Converting a JPG to PNG cannot restore detail that has already been removed by lossy compression. It may create a larger file, but the original lost information will not return. For the best results, start from the original source or the highest-quality version available.
Should I resize an image before compressing it?
Resizing first is often useful when the original image is larger than the destination requires. By reducing unnecessary pixel dimensions before compression, you may be able to create a smaller output while maintaining suitable visual quality. Preserve the aspect ratio and avoid reducing the dimensions too far.
Is it safe to use an online image-compression tool?
Safety depends on the particular service and its data-processing practices. Review whether the tool uploads files to a remote server or processes them locally in the browser, and consider whether your images contain confidential information. RupaaCompress states that its image processing takes place locally in the browser without uploading the image files to its servers.
Can I compress multiple photographs at once?
Yes. Batch-processing tools allow you to select several images or an entire folder and apply the same settings to a collection. This can be especially helpful when preparing website images, product photographs, event galleries, or other large image collections. It is still important to inspect the output because different image types may respond differently to the same compression settings.
Will compressed images load faster on my website?
Smaller image files generally require less data to download, which can help improve loading performance, particularly on pages containing many photographs. Actual page speed also depends on network conditions, caching, server response times, scripts, layout, and other factors. Properly sized and compressed images are one important part of a broader website-optimization strategy.